
This article will guide you how to add devices to your hub.
Preparation:
Before we begin, please make sure that your Hub is connected to your Wi-Fi network. If it isn’t, you’ll need to set it up before proceeding. For guidance on this, you can consult the Setup New Hub article.
Setup Procedure:
Once your Hub is connected, launch the app on your device, and it will automatically connect to the most recently connected Hub.
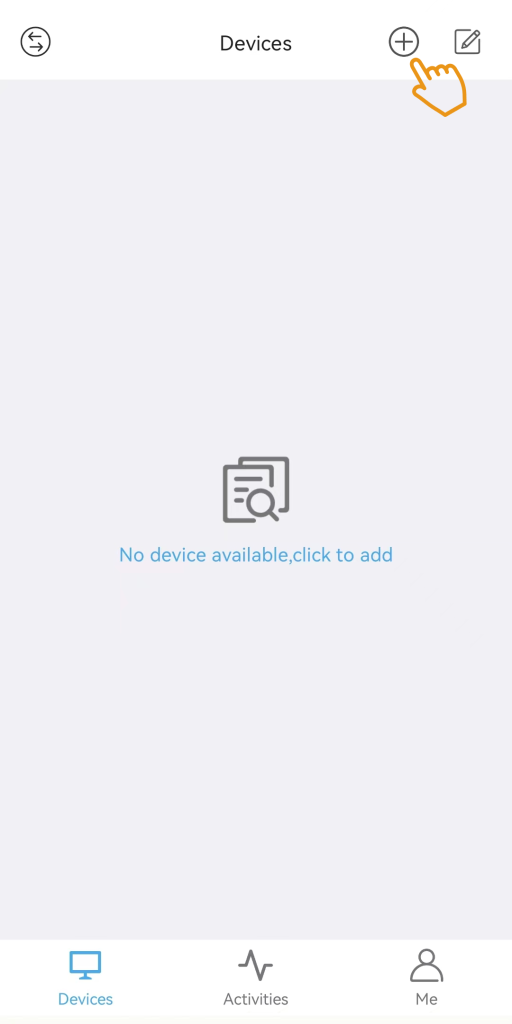
Navigate to the “Devices” page, and click the “+” icon in the upper right corner to add a new device.
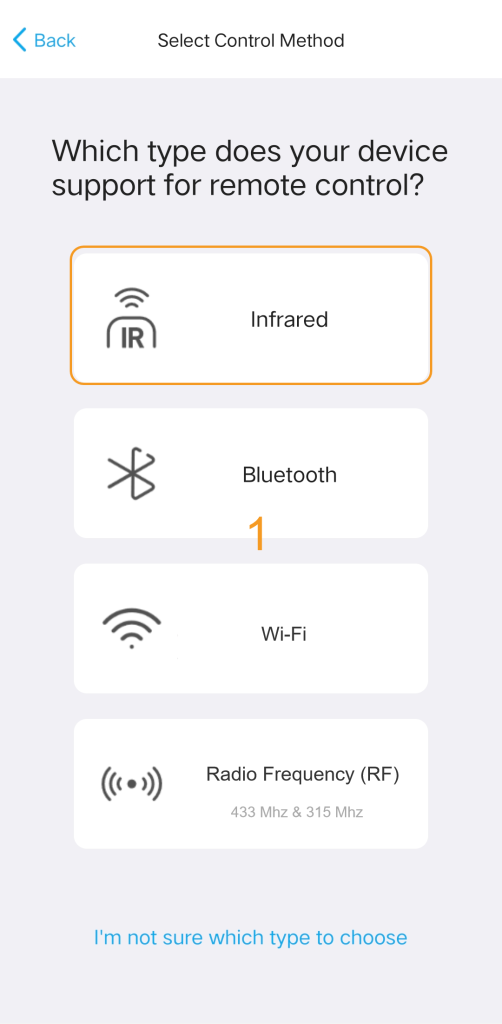
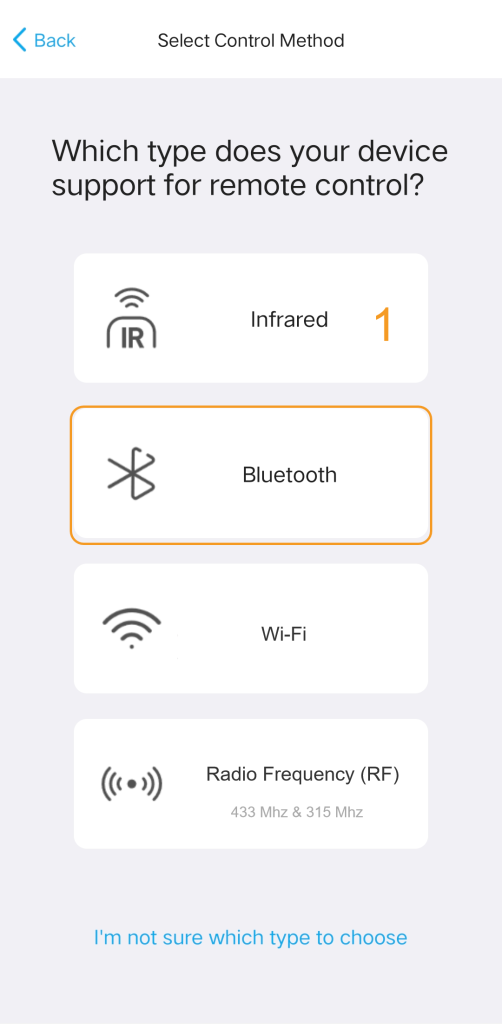
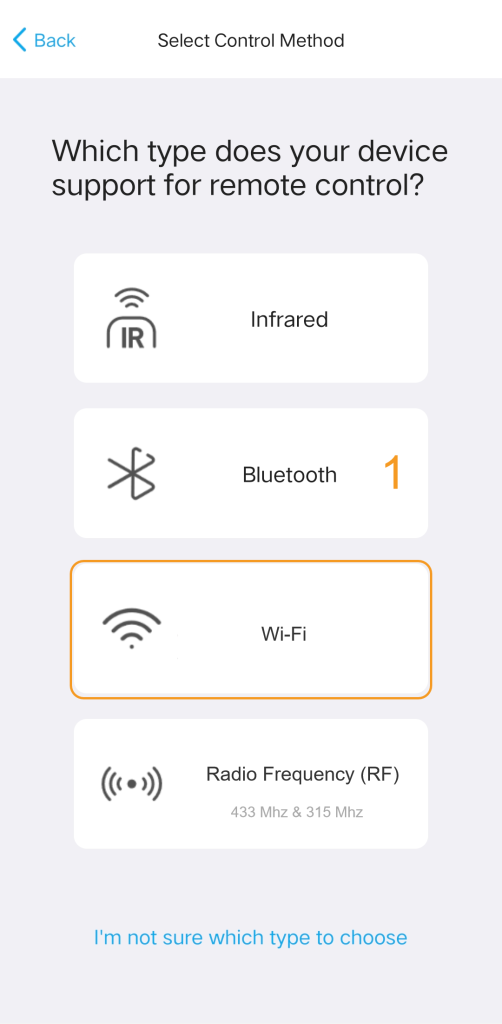
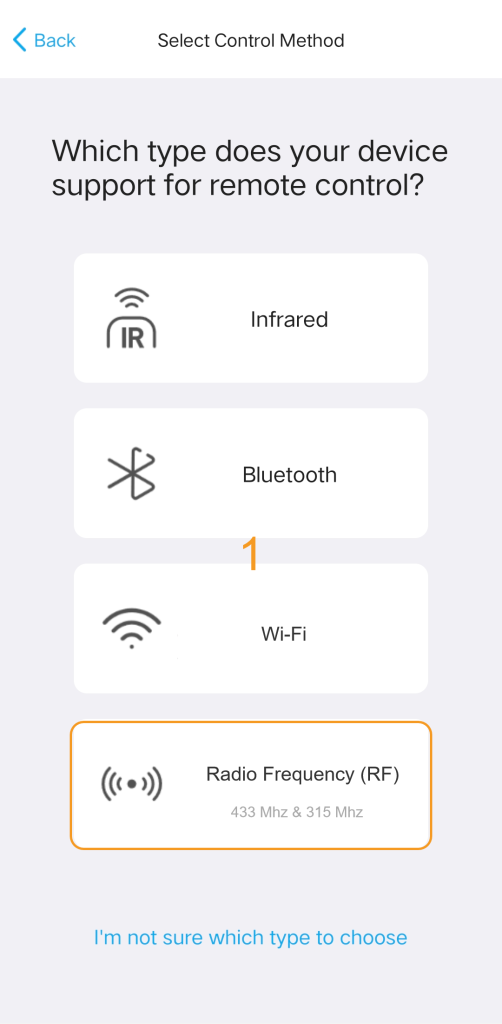
There are four options for adding devices: Infrared Control, Bluetooth, Wi-Fi and RF.
If you are unsure about your device’s control technology, please tap “I’m not sure which type to choose” at the bottom of the screen.

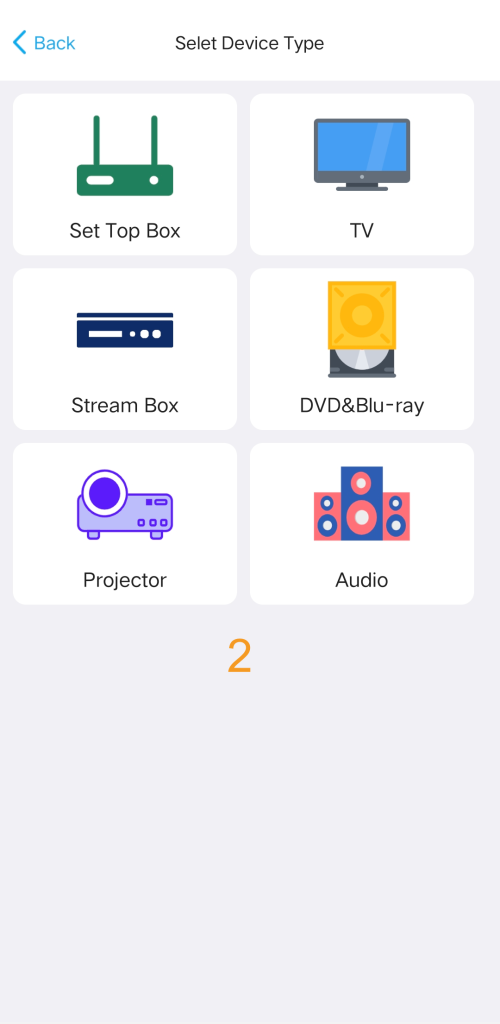
Next, follow the instructions on the app page to complete the subsequent settings. You can select the actual device type to view detailed instructions.
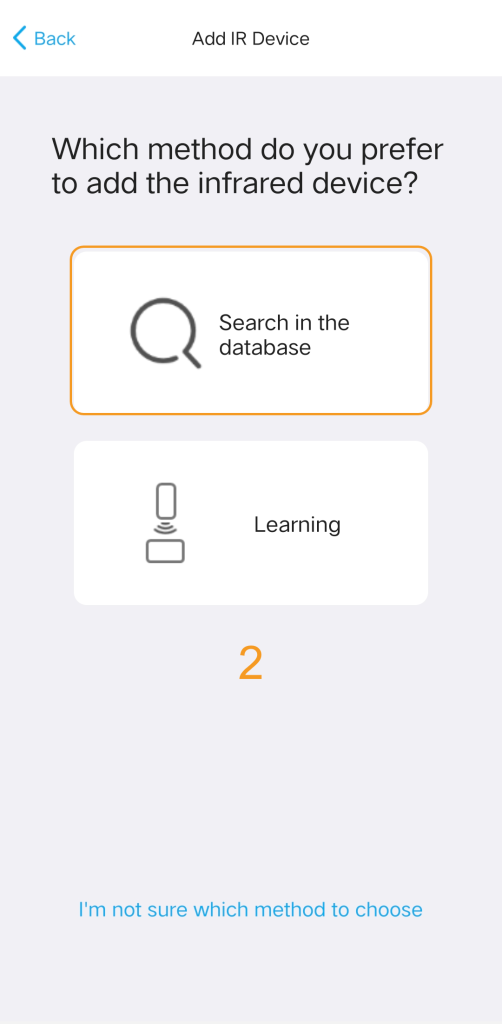
1. Add a Infrared device
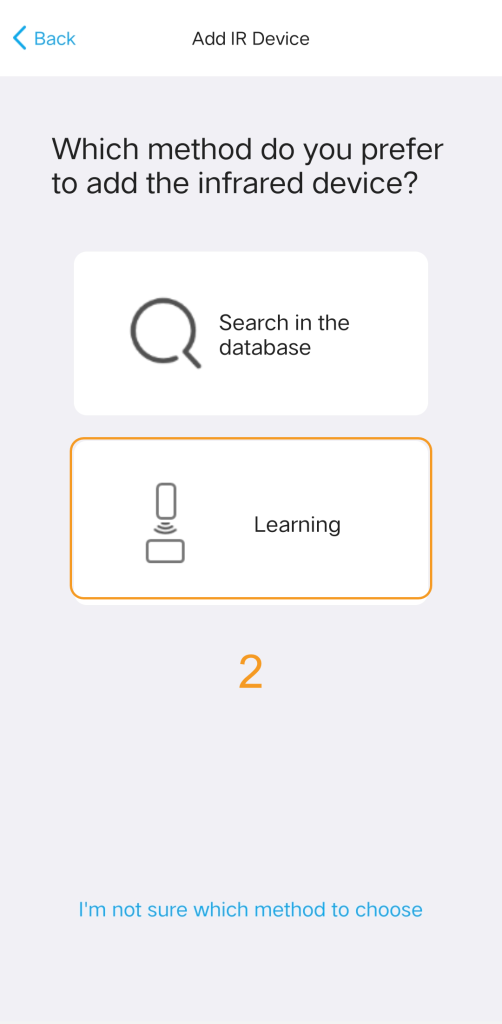
You can add an infrared device in two ways: by searching in the database to download the code library or by learning from the original IR remote .
If you only need one or two commands for daily use, such as Power, it is recommended to learn directly from the original remote. Otherwise, it is advisable to prioritize searching in the database.
1.1 Search in the databae
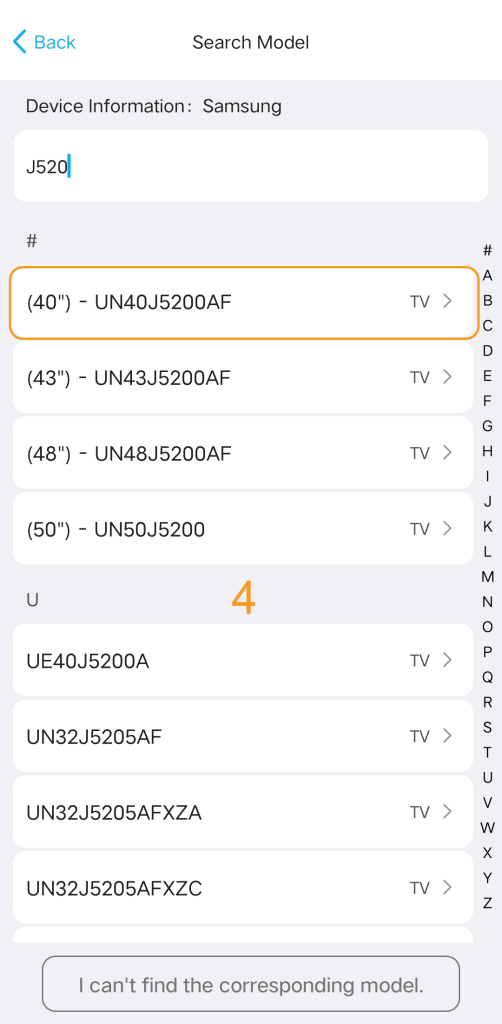
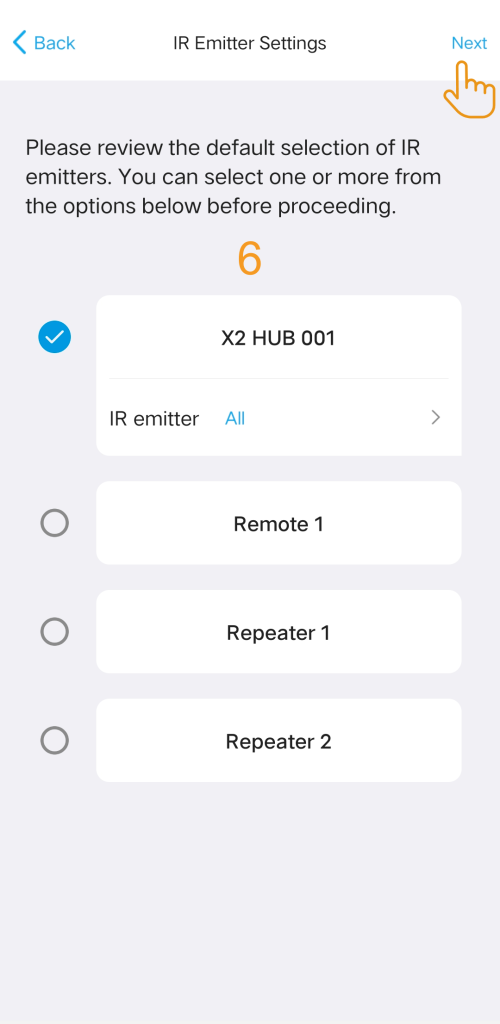
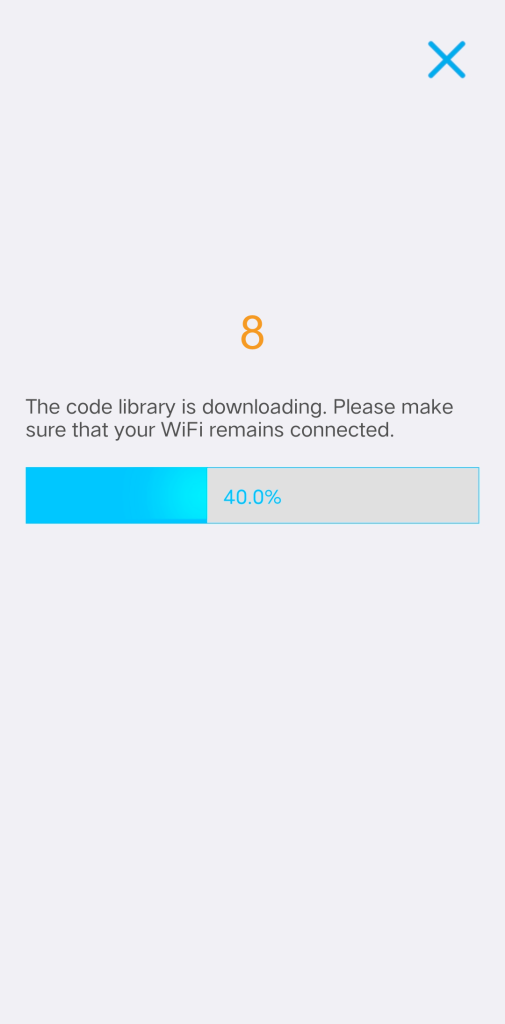
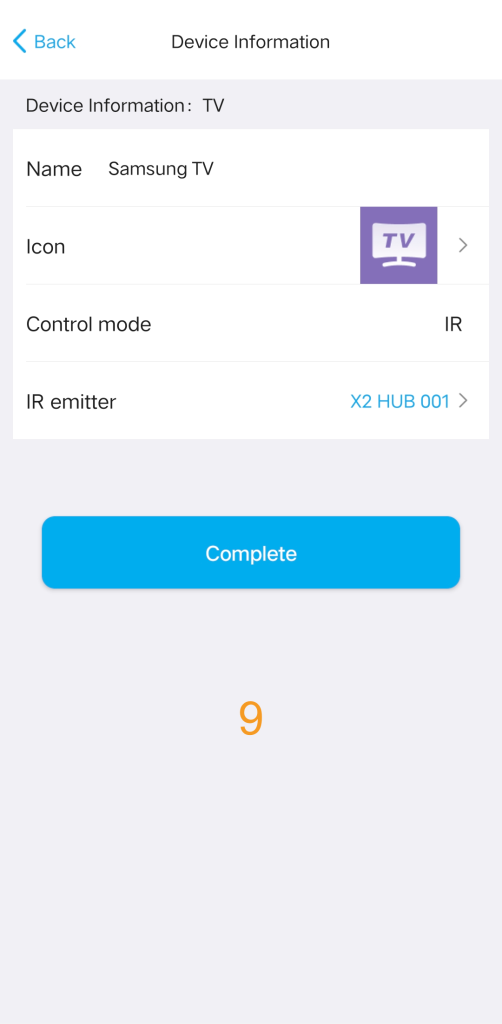
Navigate to App > Devices > Add > Infrared > Search in database.
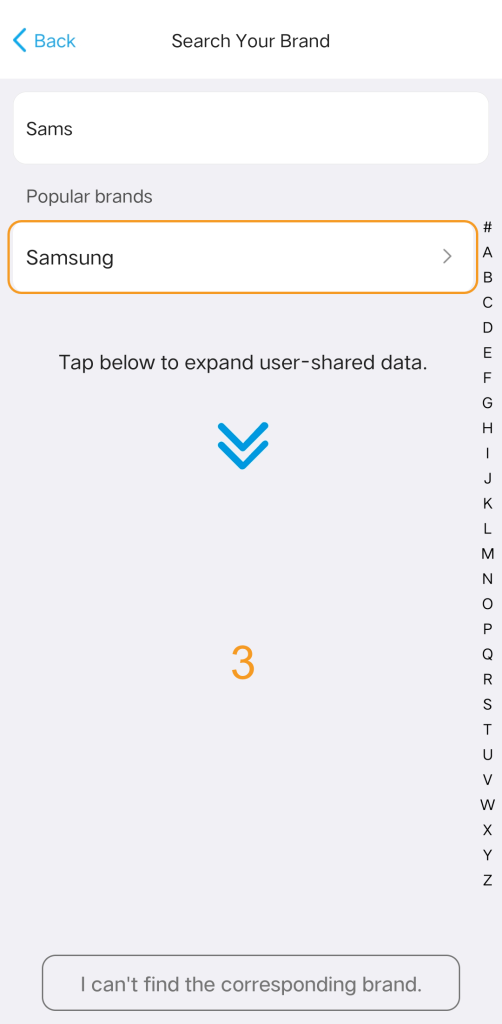
Simply enter your device’s brand and model to find a match. If your specific model isn’t listed, try testing a similar model or select a generic option from the same brand series.
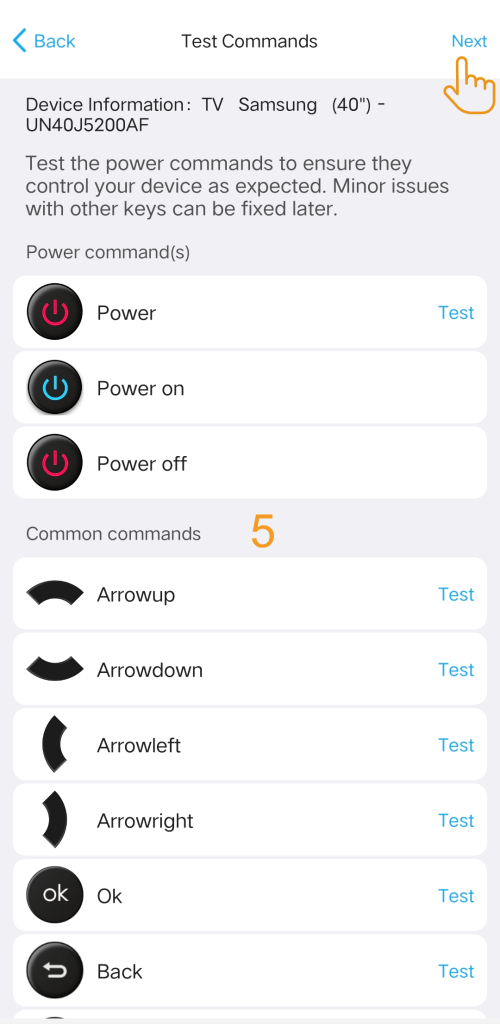
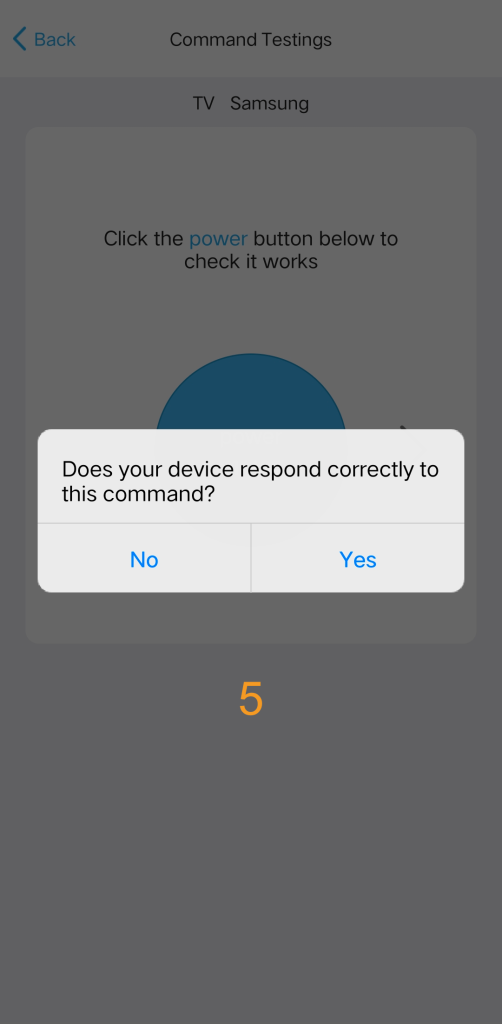
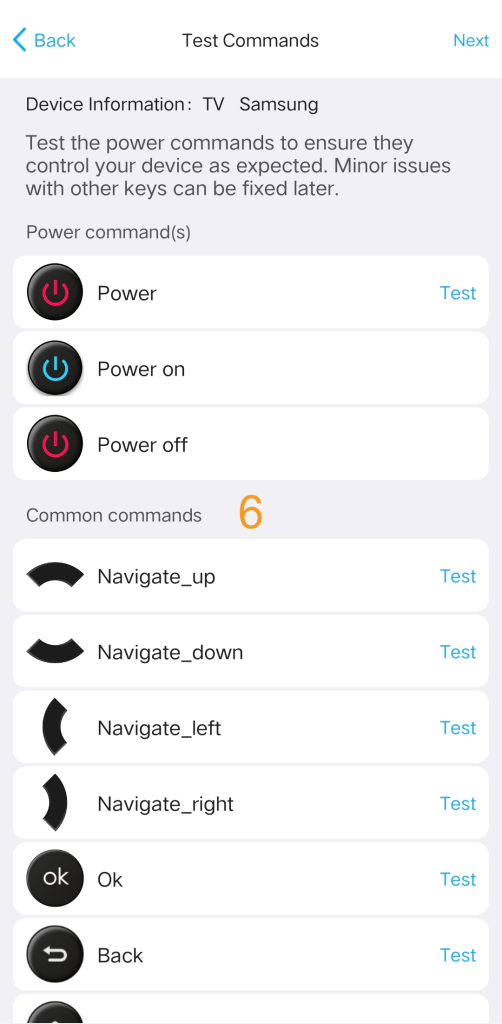
1.2 Test commands to match the correct code library.
If your device model is not in the database, you can test a few commands to find a suitable code library. select“I can’t find the corresponding model” after searching your device brand.
![]()

![]()
![]()

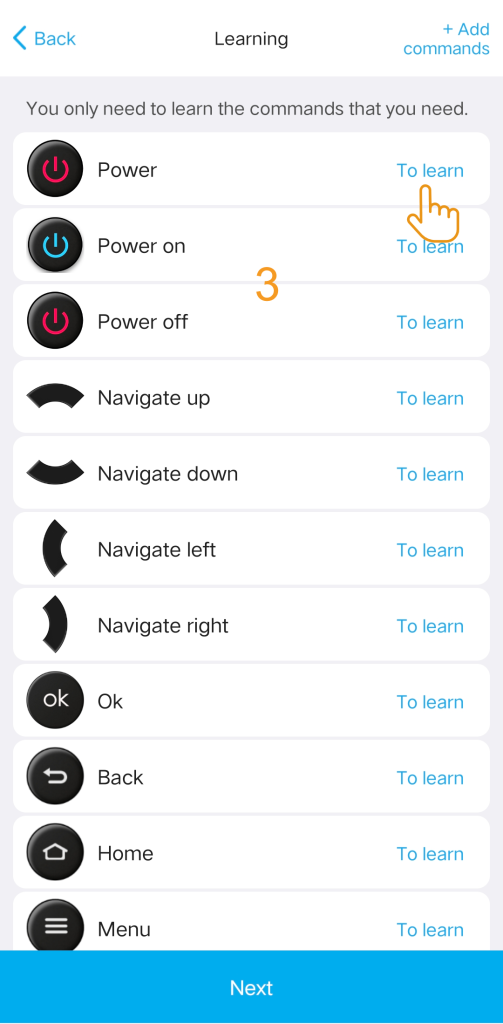
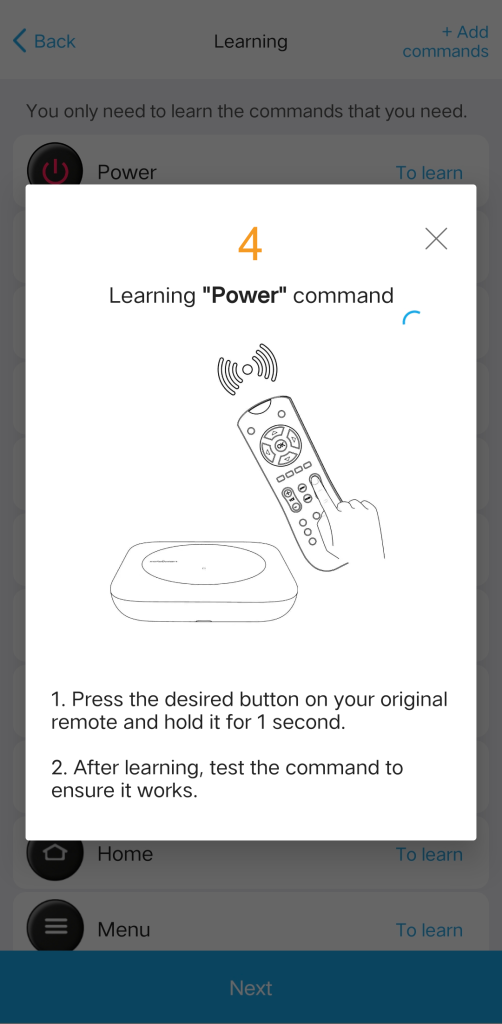
1.3 Learn from original remote

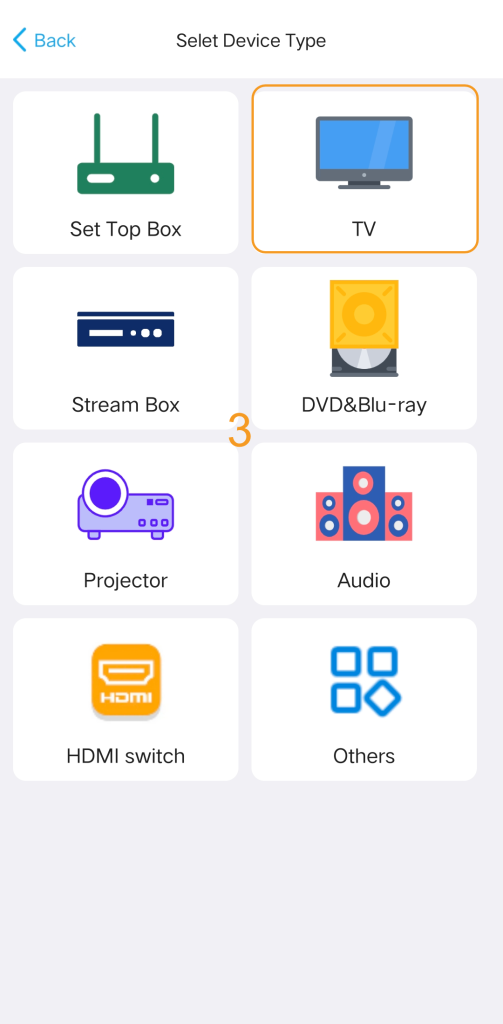
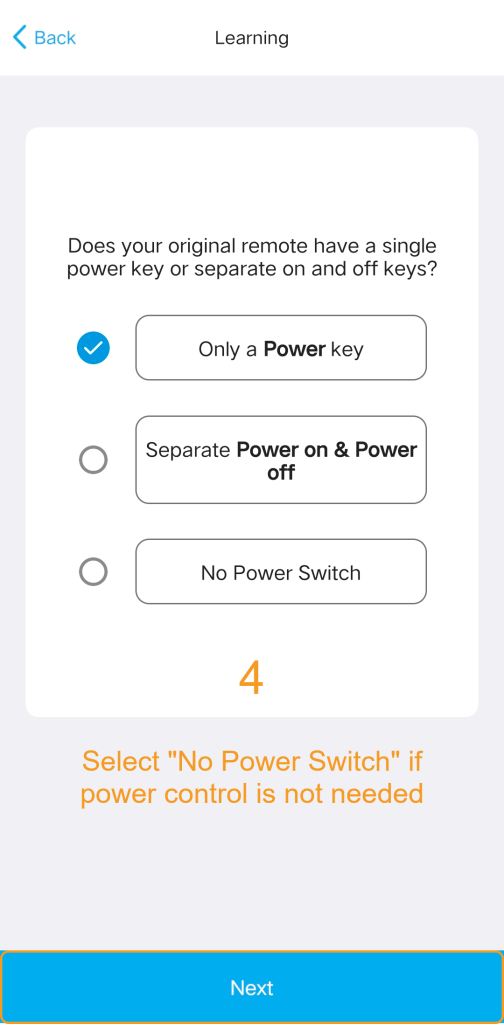
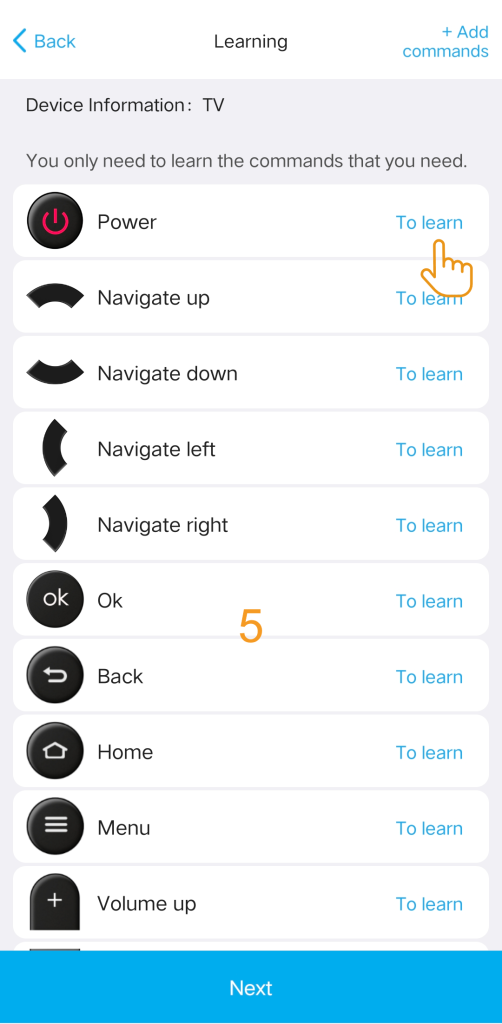
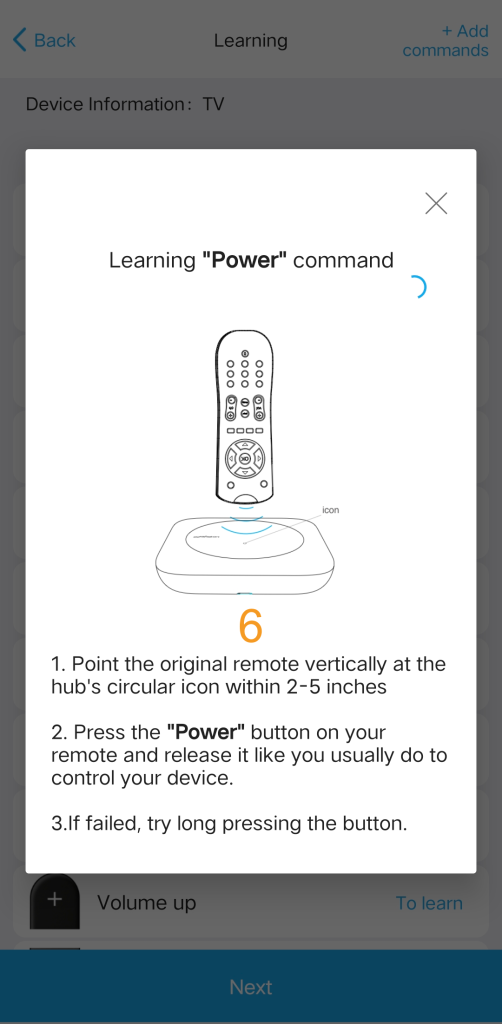
![]()
![]()
![]()
If you’re having trouble with command learning, go back to the previous menu and try entering the learning mode again.
If the command seems to have been learned successfully but isn’t working when you test it, give learning another shot. Remember, there’s no need to hold the button down—Just a quick press and release, as you would normally do, ought to do the trick.
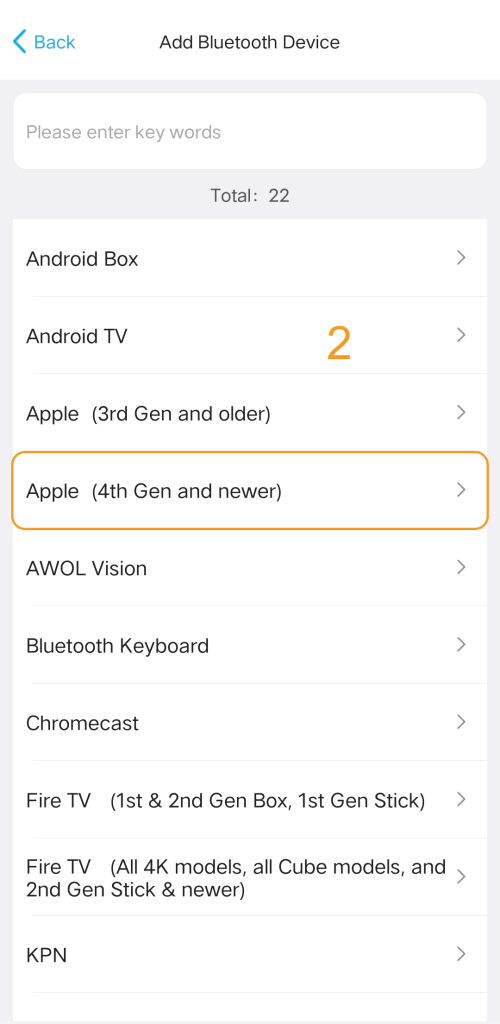
2. Add a Bluetooth device
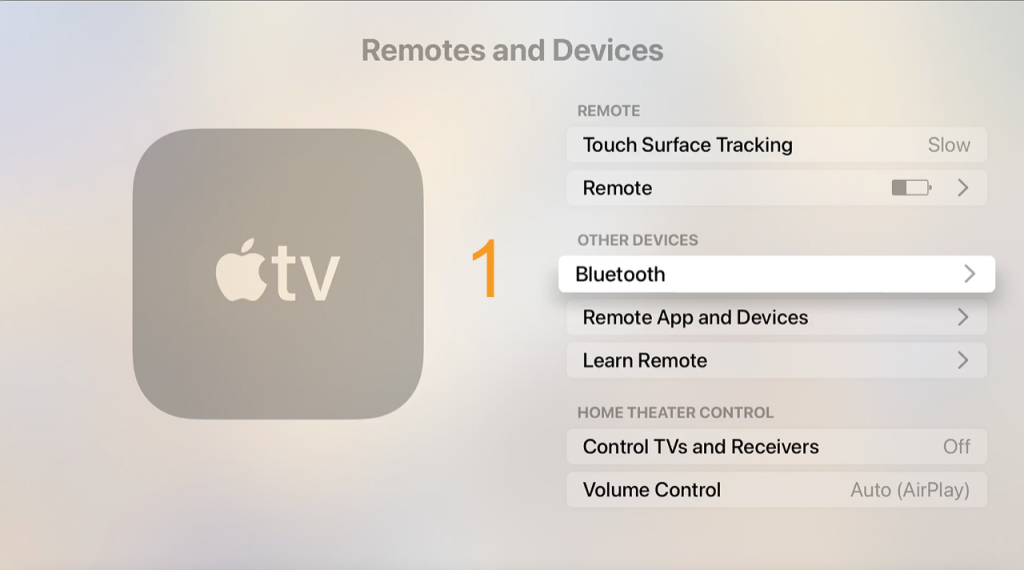
Let’s take a look at how to add a Bluetooth-controlled device using Apple TV as an example. Since AppleTV is a Bluetooth-controlled device, you will need to navigate to the Apple TV settings to complete the pairing process. To accomplish the task, follow these steps:
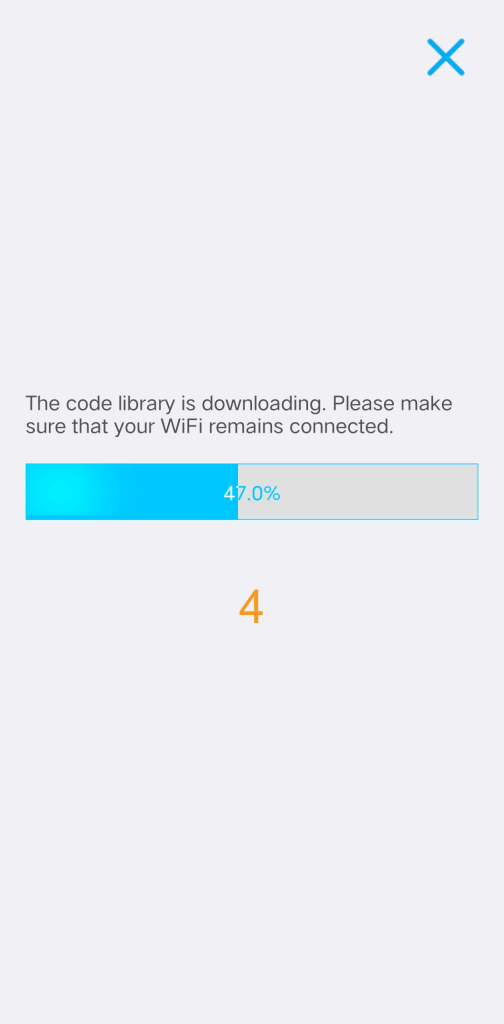
Stage 1: Please choose your device and proceed with downloading the code. The process may take approximately twenty seconds.
![]()
If your brand is not listed, you can select a generic profile like Bluetooth Keyboard, Android Box, or Other. Once paired, the X2 acts as a standard input device to control it.

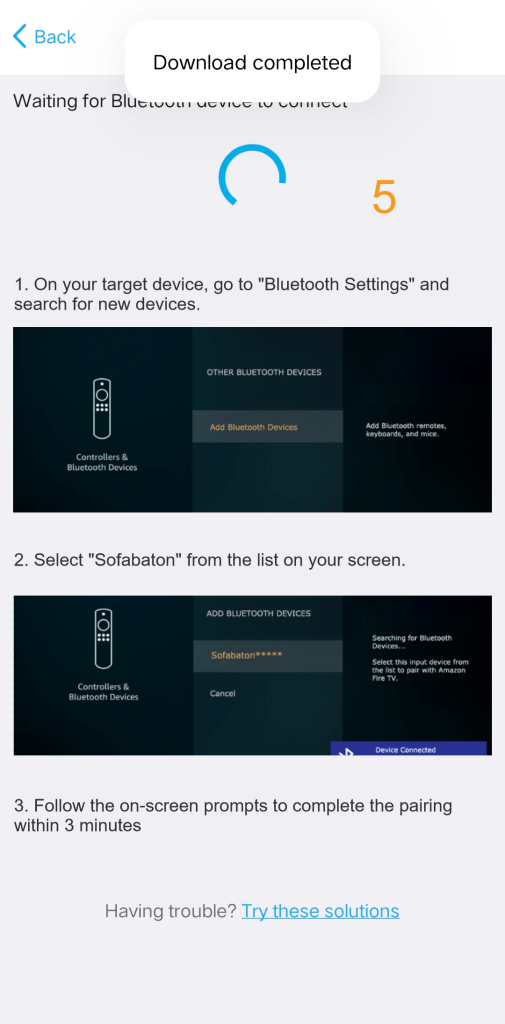
Stage 2: Go to the settings of your Apple TV, navigate to ‘Bluetooth’, and select the device starting with ‘Sofabaton’ to pair.
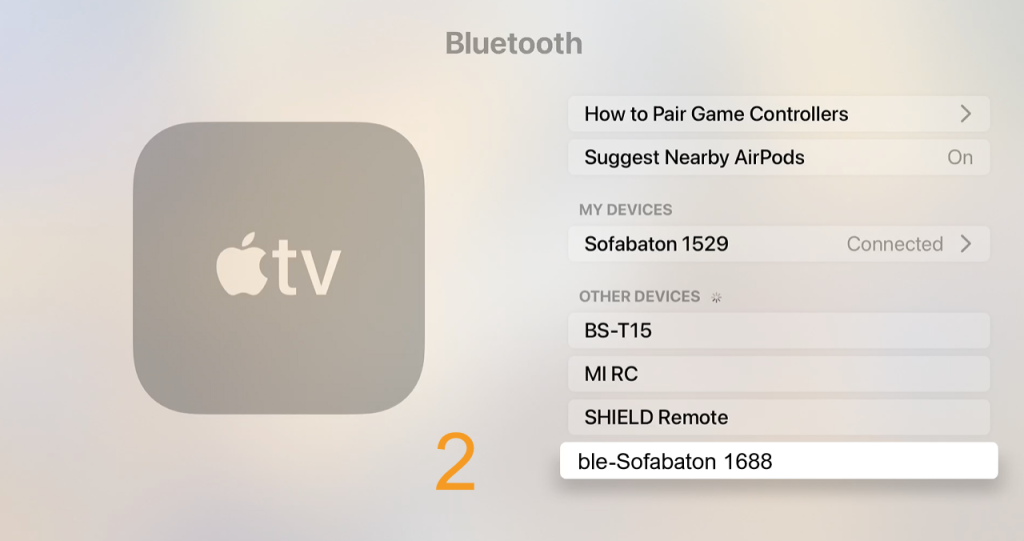
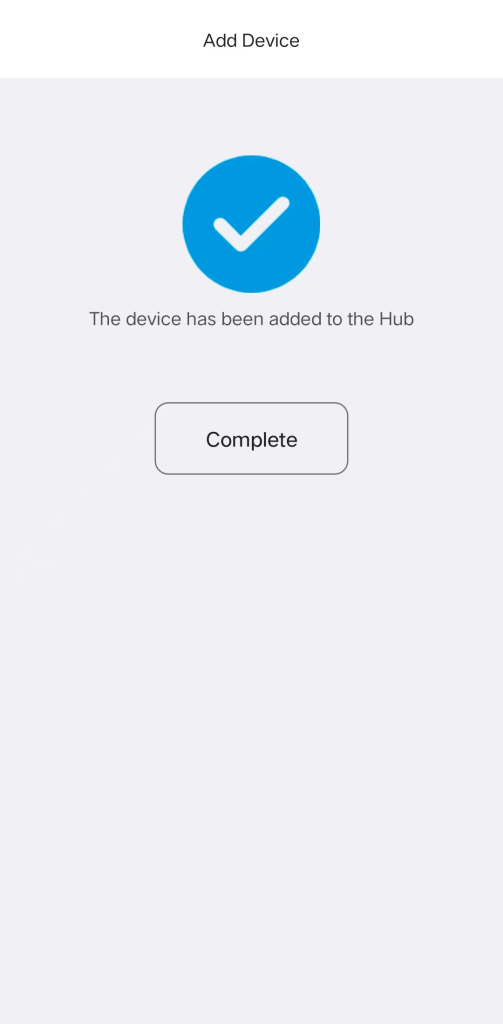
The application will display a notification indicating that the device has been added successfully.
![]()
Bluetooth Pairing & Troubleshooting
1) Troubleshooting Pairing Failure:
If your device cannot find “SofaBaton” during scanning, please restart the device you are pairing. Then, go back to the previous page in the App and re-enter to prompt the Hub to broadcast the pairing signal again.
2) Choosing Bluetooth Modes (BLE vs. BT):
The X2 supports two Bluetooth modes: BLE (Recommended) and BT.
- BLE (Bluetooth Low Energy): Strongly Recommended. The X2 supports up to three BLE devices running simultaneously (always online), ensuring instant, seamless control without the switching delays or errors associated with standard BT.
- BT (Standard Bluetooth): If connecting to “BLE-Sofabaton” fails, try the standard BT mode instead. Caution: The X2 can only connect to one BT device at a time, and switching between them may cause a slight delay.
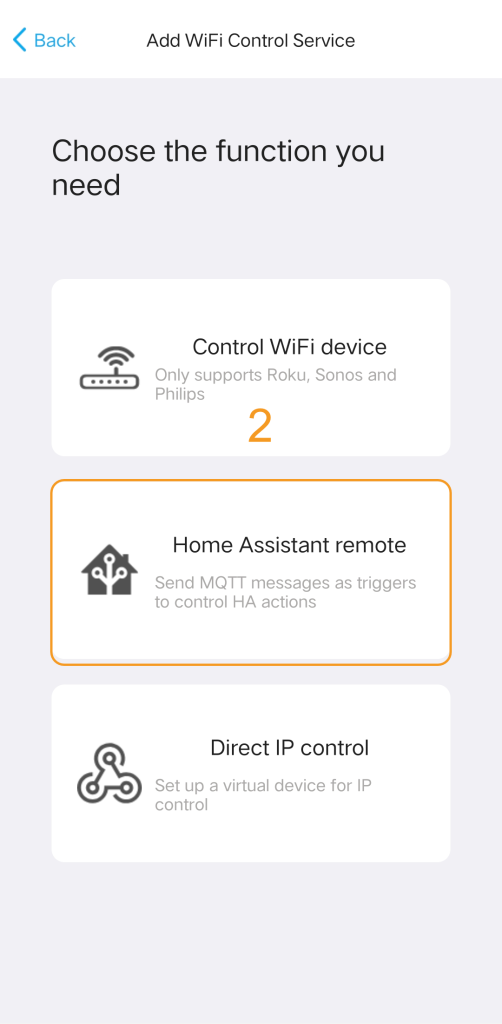
3. Add WiFi Control Service
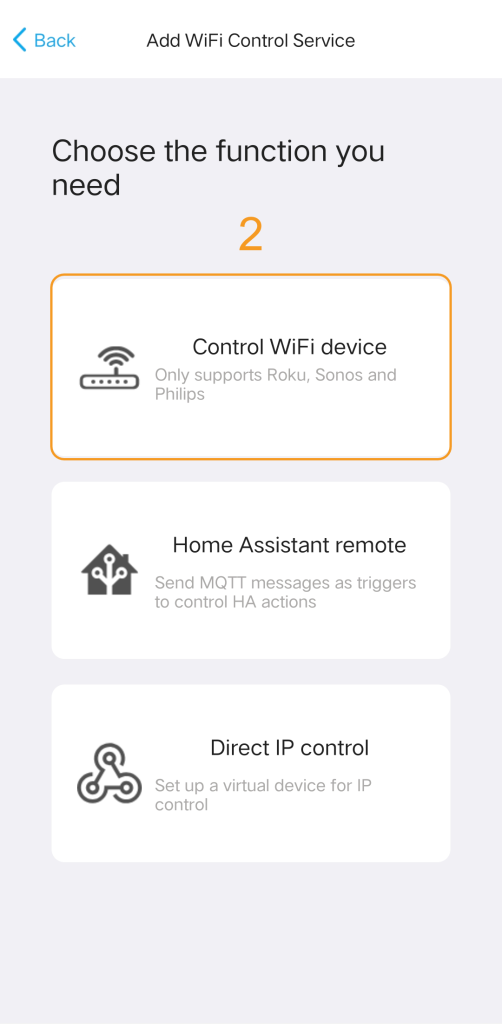
The X2 supports multiple methods for adding Wi-Fi Control Services, including:
- Add WiFi Control Device (Automatic scanning for compatible devices on the 2.4GHz network)
- Add Home Assistant Remote (Integration via MQTT service)
- IP Control (Direct control using URL and Request Method)
3.1 Add WiFi Control Device
Currently, we only support devices from Roku, Sonos, and Philips Hue.
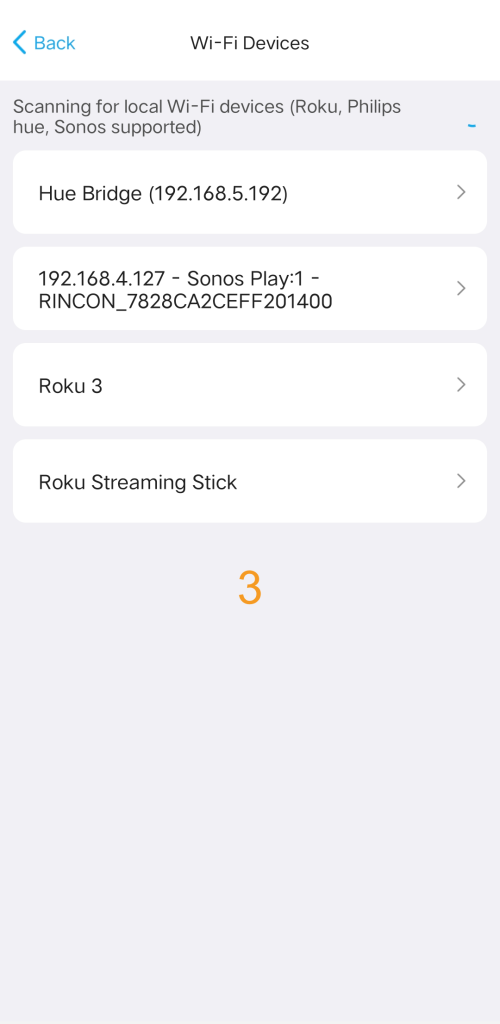
Select the ‘Wi-Fi’ option to add a device.
- For Android: The app will automatically scan your local network for compatible devices.
- For iOS: Please select the device Brand first to initiate the scan.
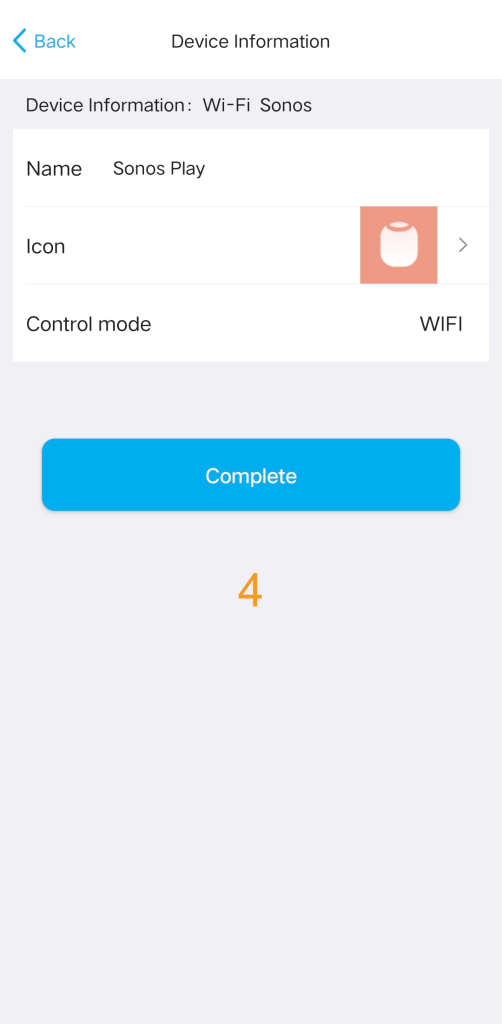
Once your device appears, select it and follow the on-screen instructions to complete the setup.
![]()
Wi-Fi Connection & Troubleshooting
- Device Not Found? If the app cannot discover your device, please ensure that your Phone, the Target Device, and the Hub are all connected to the same Wi-Fi network. (Note: The Hub requires a 2.4GHz Wi-Fi connection.)
- Connection Lost? (IP Address Issues) Wi-Fi devices are controlled via IP address. If your router assigns a new IP to the device, the remote may lose control. You can update the IP manually in the app: Path: Devices > [Select Device] > Edit > Reset device IP.
3.2 Add Home Assistant Remote
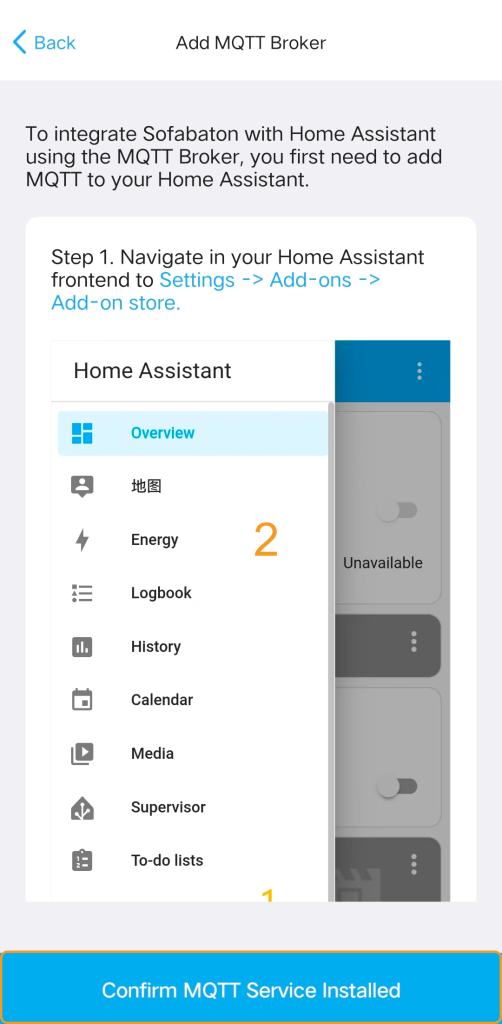
To connect your Sofabaton Hub to Home Assistant, you must first have MQTT set up in your Home Assistant instance (this typically involves installing and configuring an MQTT Broker).
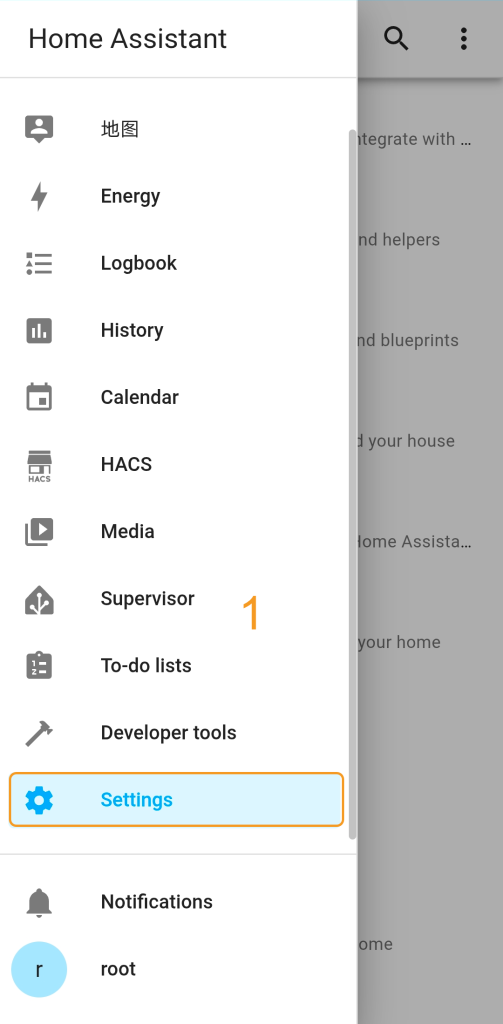
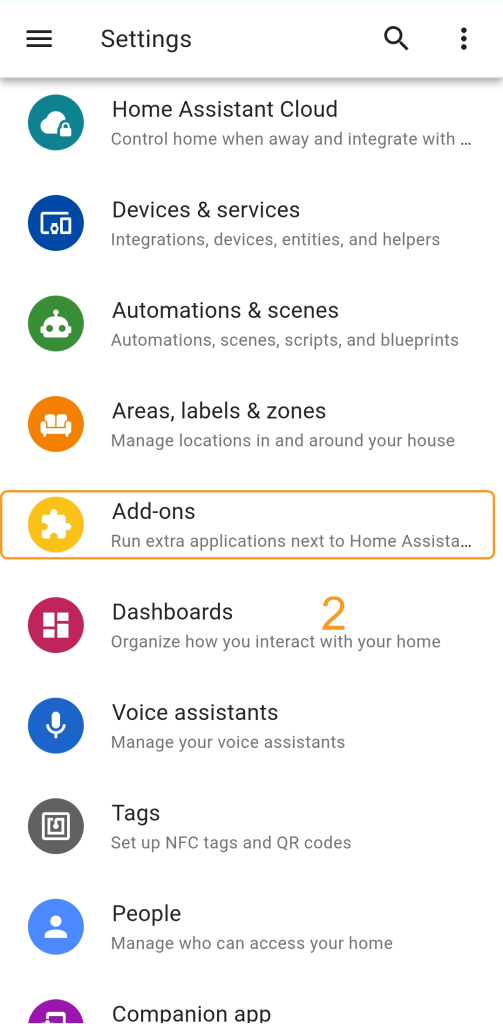
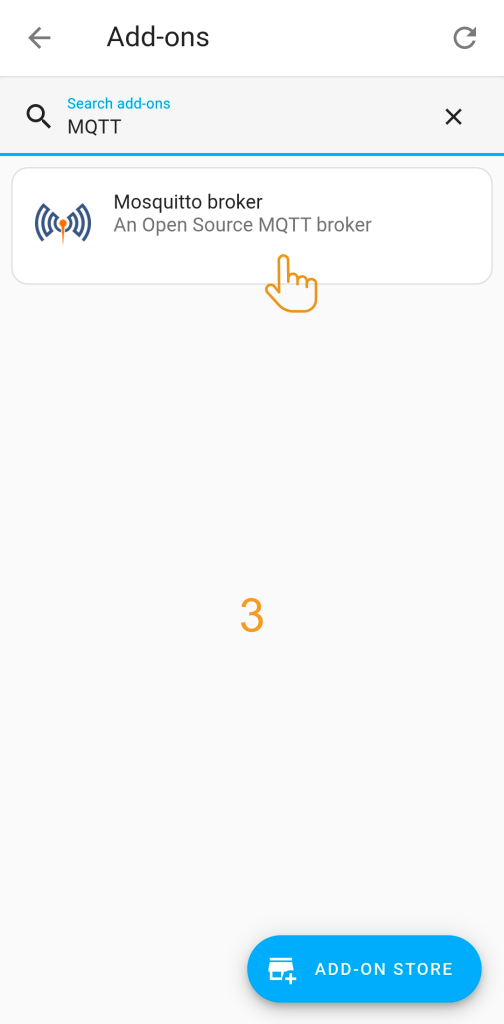
Step 1. Navigate in your Home Assistant frontend to Settings > Add-ons > Add-on store, find the “Mosquitto broker” add-on and install it.
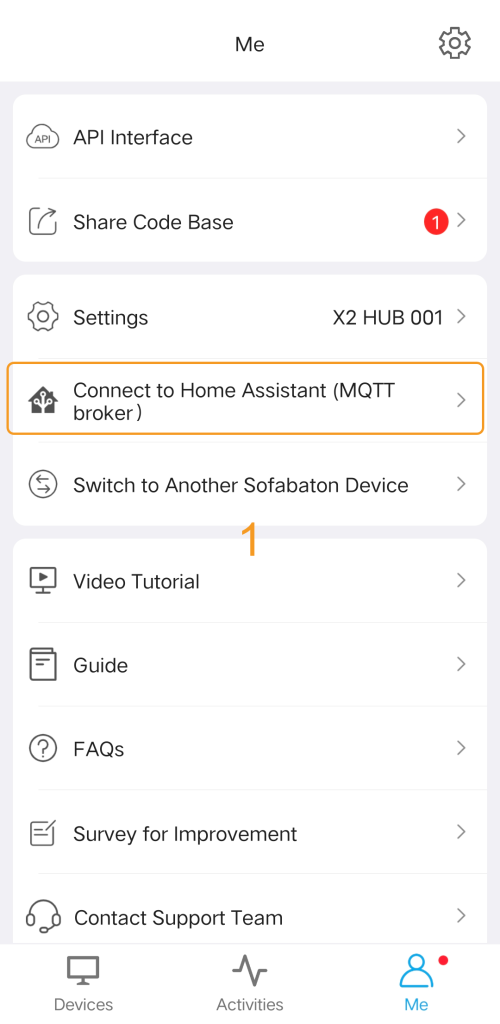
Step 2. Enter the MQTT Broker’s connection details into the Sofabaton app to enable communication between the Hub and your Home Assistant system.
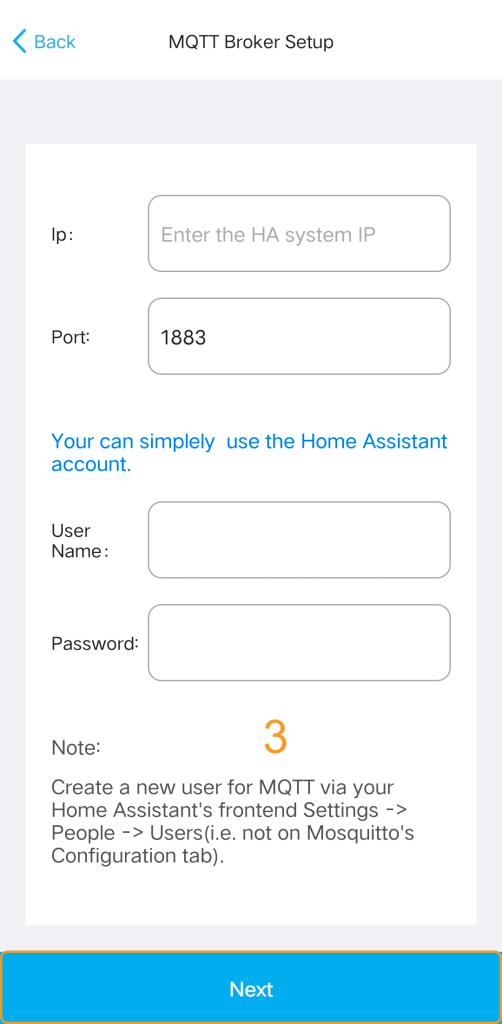
![]()
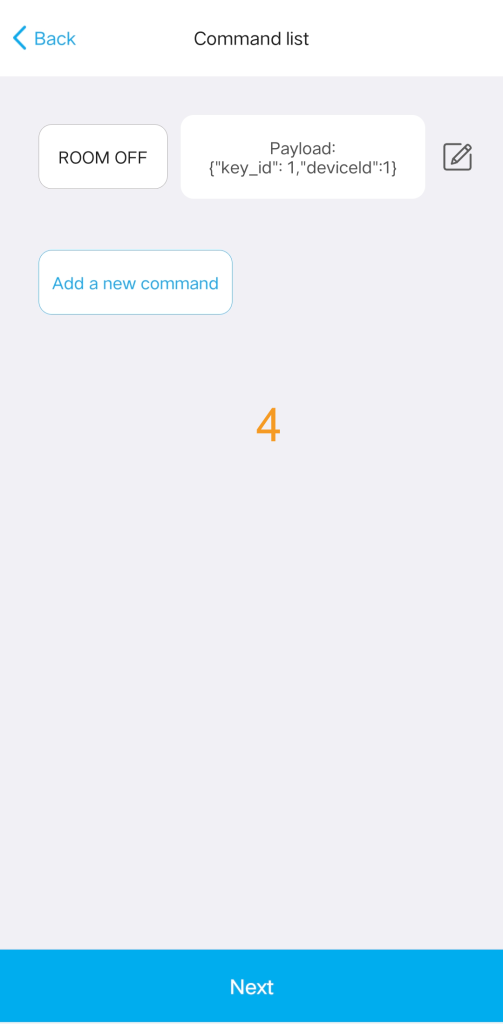
Step 3. Add a virtual remote and setup commands in the Sofabaton app for controlling Home Assistant.


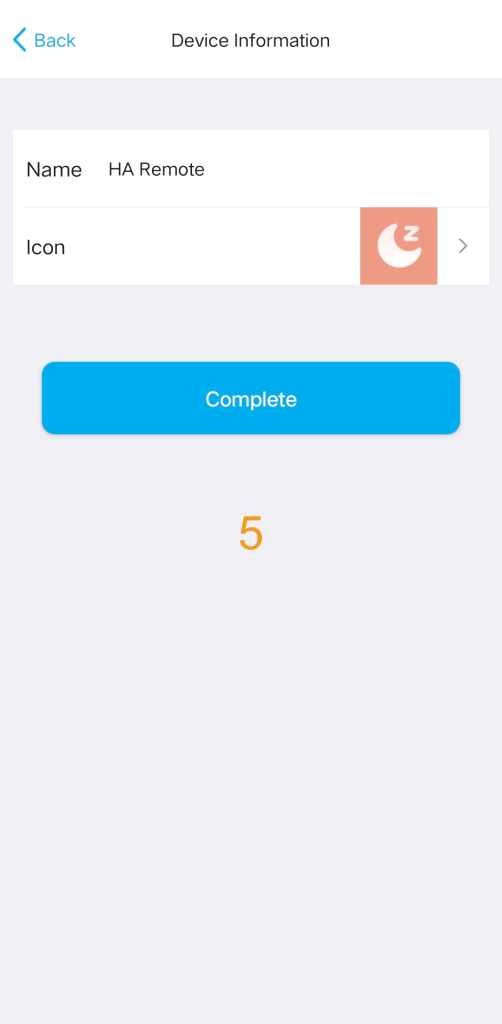
Step 4. In Home Assistant, you can set up automations to listen for MQTT commands from this virtual remote to trigger your desired automation functions.
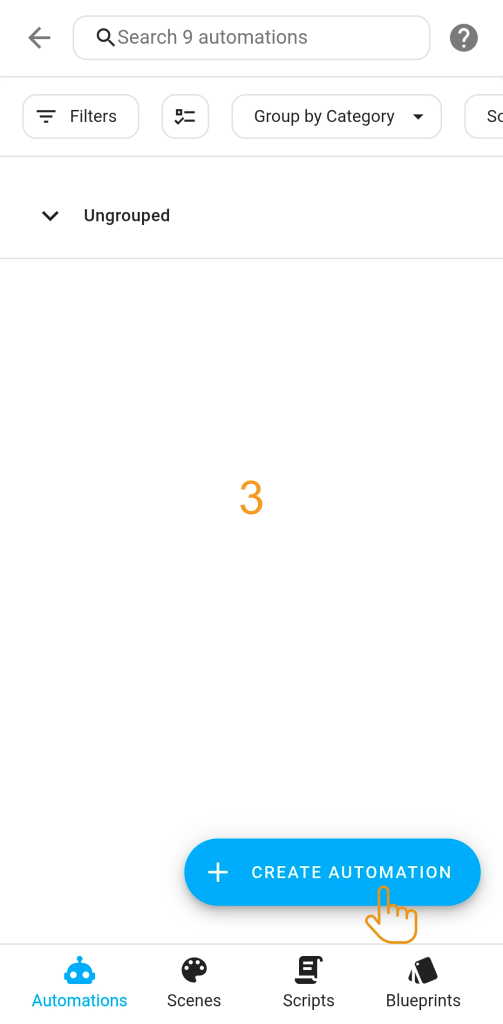
First, navigate in your Home Assistant frontend to
Settings -> Automations & scenes -> +CREATE AUTOMATION -> Create new automation –> + ADD TRIGGER, find “MQTT” tigger.


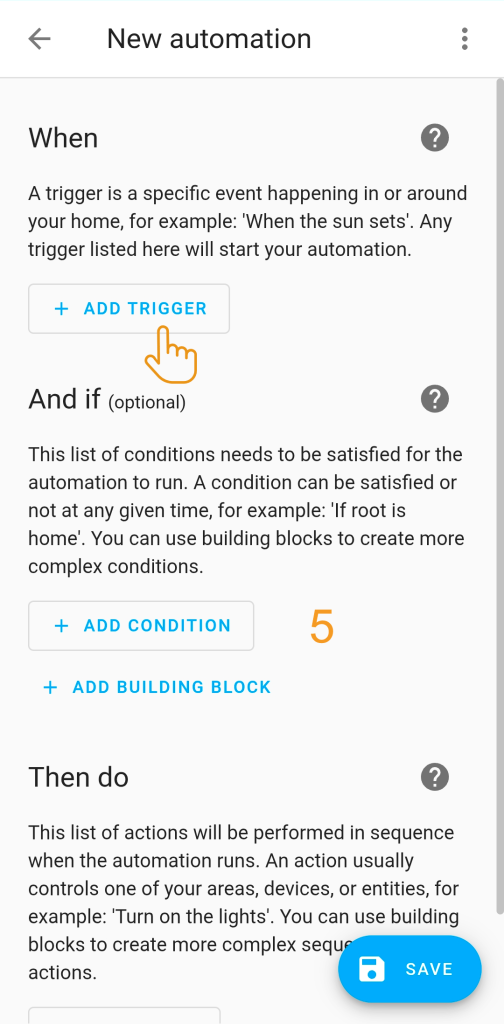

And then, enter the HA remote’s corresponding MQTT subscription Topic and command parameters (Payload). The automation will be triggered upon receiving an MQTT message that matches this information.
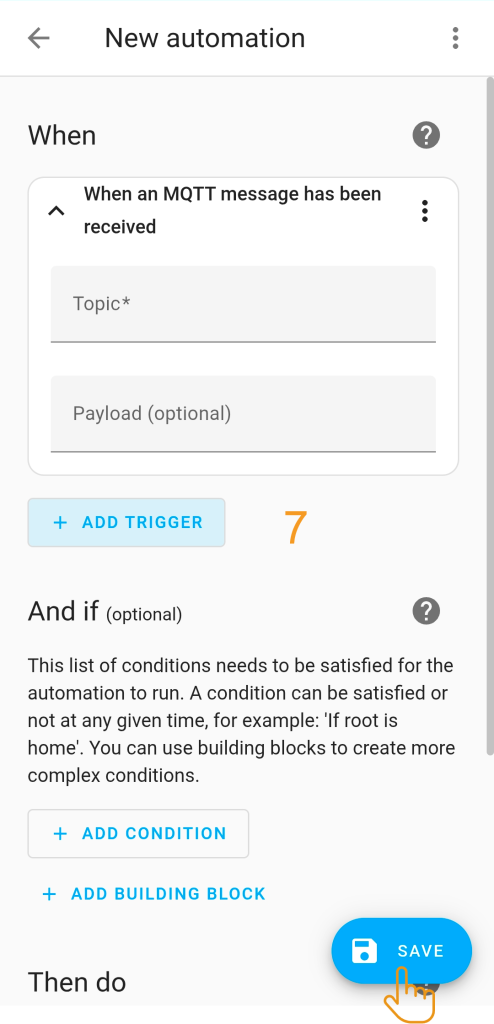
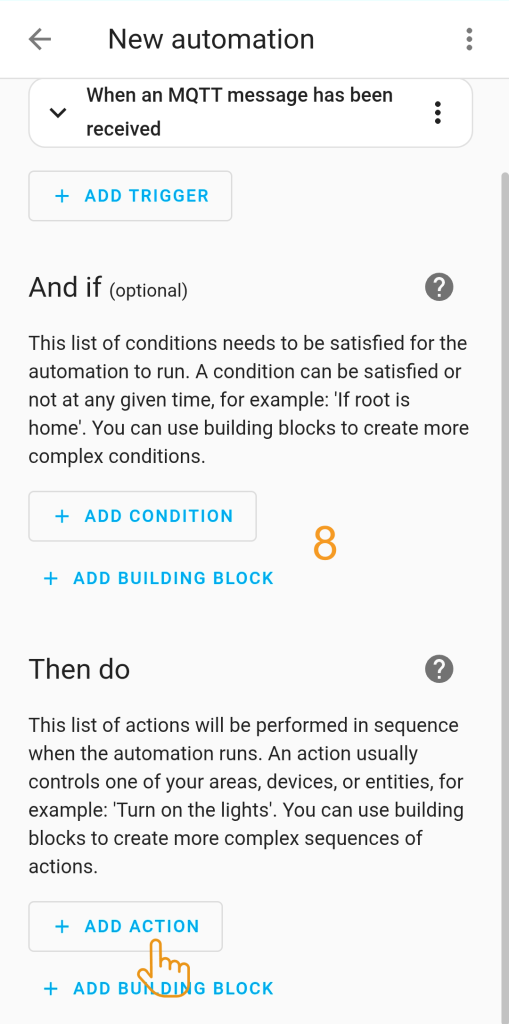
Finally, set up the “Then do” action and save the automation.
3.3 IP Control
You can directly add a virtual device in the Sofabaton app for IP control.
Please note that each command requires individual setup of the URL and Request Method (e.g., GET, POST).

![]()
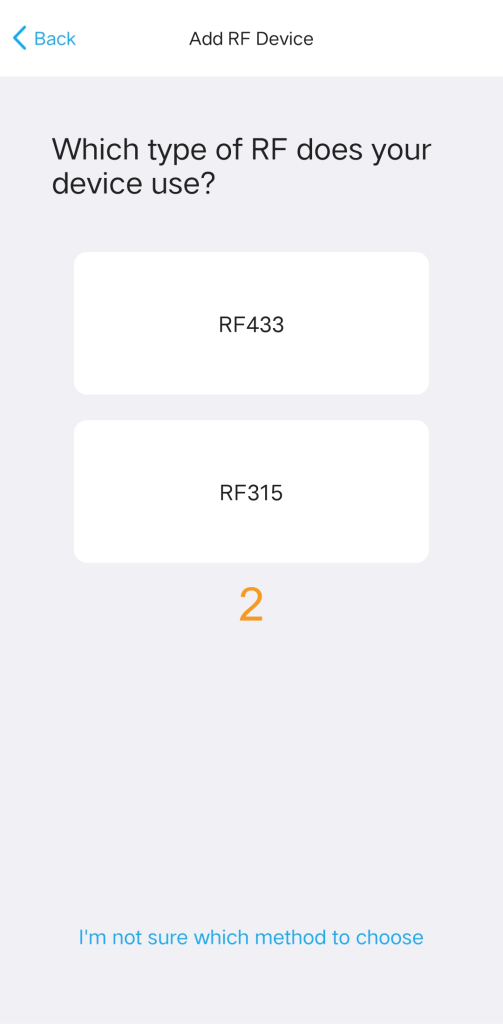
4. Add a RF device
Learn the signal directly from the original remote to add your RF433/RF315 device.
![]()
![]()
Important Tips:
- Minimize Interference: Avoid learning near strong electromagnetic sources (like powerful electrical appliances or wireless routers) to ensure clean RF signal capture.
- Verify Reliability: After learning, press the new button multiple times immediately to confirm the receiving device can stably accept the command.
- Troubleshoot Learning Issues: If learning fails, re-enter learning mode and ensure you press and hold the button on the original remote for a longer duration to capture the complete signal. Note: Advanced devices using rolling codes may not be compatible with standard signal learning.