This article will guide you through the source configuration for devices that you can switch inputs, such as TVs, projectors, AV receivers, or HDMI extenders.
If you’re looking to control devices while switching between activities automatically, you’ll find the Source Configuration feature very useful. It’s similar to “Power Settings” and allows you to manage devices that can be switched between inputs.
Preparation:
Before starting the source configuration, make sure you have added devices. . If you haven’t added any yet, you can consult the Adding devices article.
Setup Procedure:
1. Accessing Source Configuration:
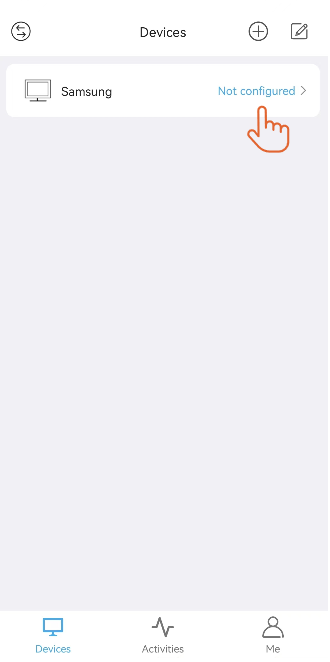
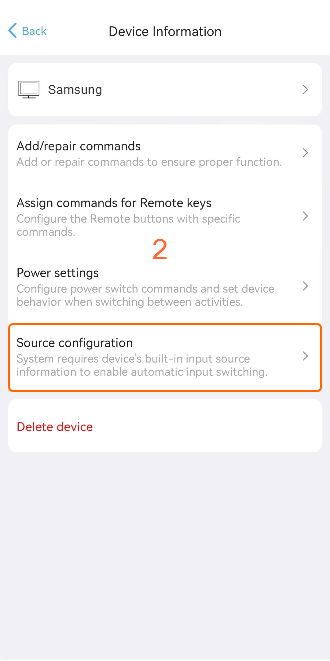
When you add a new device, you may notice a “not configured” tab on the right side of the device. This is a reminder that you need to complete some task before creating an activity. Click on this tag for more detailed.
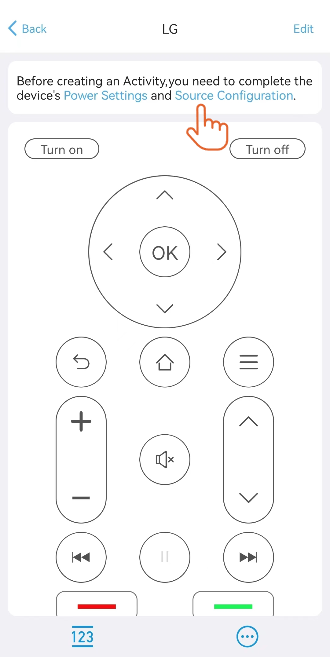
For some devices like TVs, projectors, AV receivers, you will see a “Warm Tip” at the top of the page, reminding you to complete the Source Configuration before creating an Activity. To do so, click on “Source Configuration” to enter the settings page.
![]()
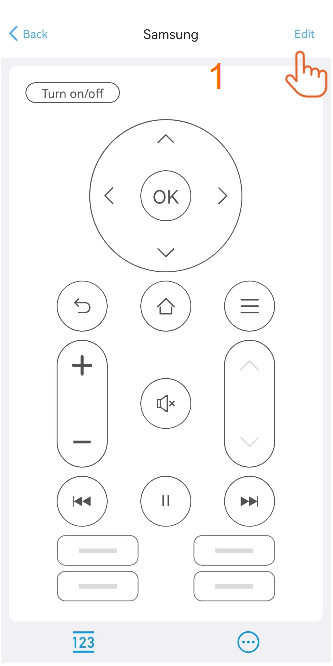
If your page does not display a “Warm Tip,” click “Edit” and choose “Source Configuration” from the options bar.
2. Setting Up Source Configuration:
2.1 Verify if you need to switch inputs
The screen will ask you if you need to switch inputs; you can choose according to your needs.
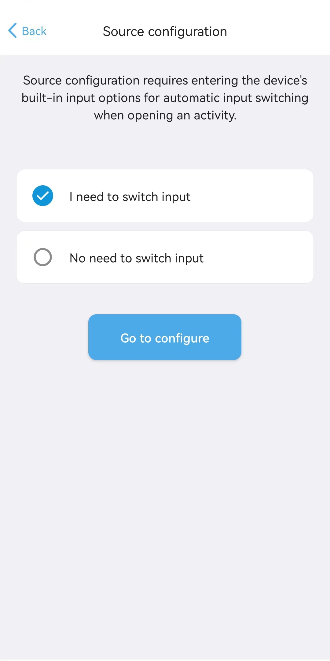
For example, the TV and AV receiver can switch inputs, but if you connect other devices, such as STB, streaming media box, or DVD player, to the AV receiver and not to the TV, you don’t need to change the TV input.
- For the TV setup, select “No need to switch input” and click “OK” to exit. The Source Configuration tab on the Device Control page disappears. However, for the AV receiver, you must select “I need to switch input” and proceed to configure it.
- For the AV receiver setup, select “I need to switch input.” and continue the configuration process.
When you start configuring the source information, the X1/X1S system will assist you in specifying how the devices switch between inputs, available inputs, and their arrangement. This information is vital for the system to calculate the operational steps when activities begin and automatically change to the correct input.
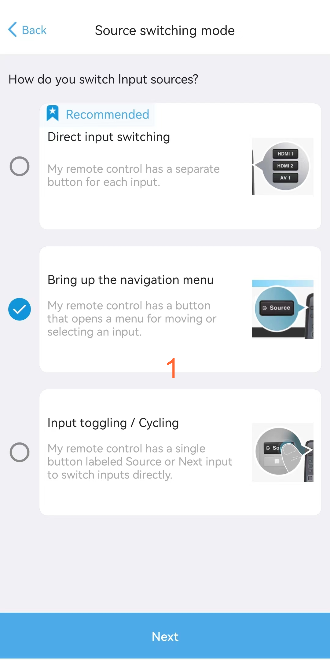
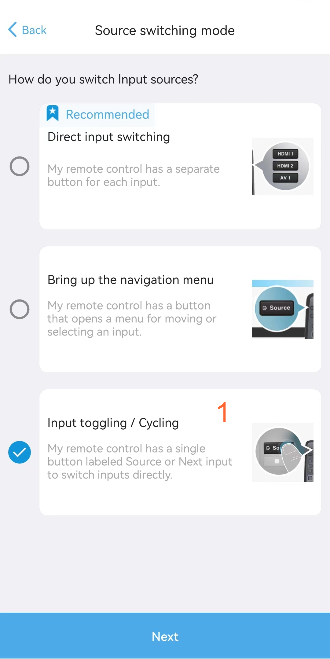
2.2 Setup for different switching mode
Follow the prompts on the app page to complete the subsequent settings. You can click on the corresponding switch method below to view detailed instructions.
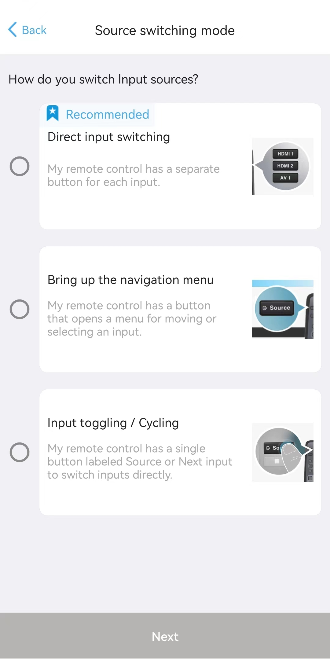
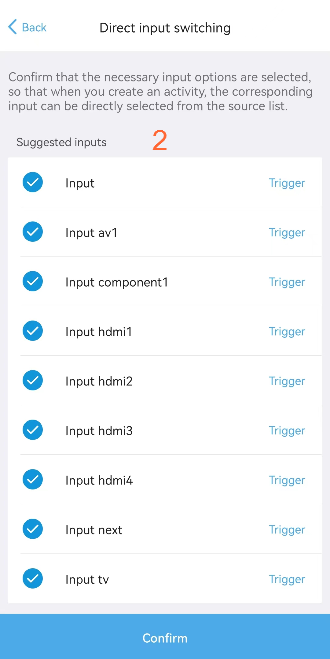
2.2.1 Direct input switching
Suppose your device has a dedicated button for each input. In that case, the app screen will suggest you choose the “Direct Input Switching” mode and automatically select possible inputs in the next step for your confirmation. Ensure you have checked all the required inputs and rename them if necessary. Once you are done, click “Confirm” to save and complete the configuration.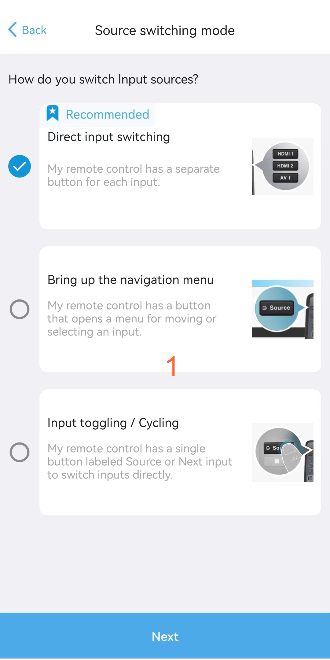
![]()
Not all devices support this switching method. Typically, you need to use the switching method of the original remote control. However, if the code library includes direct commands corresponding to the input, the app will display a recommended label, allowing you to choose this method directly.
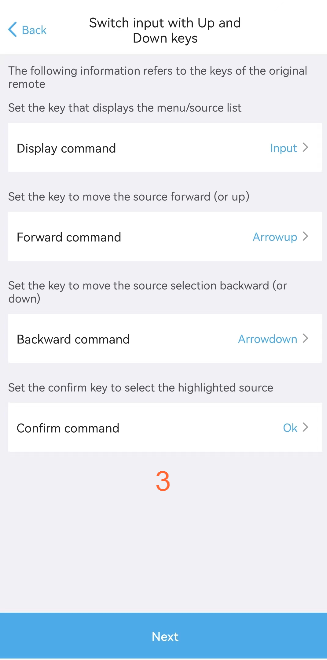
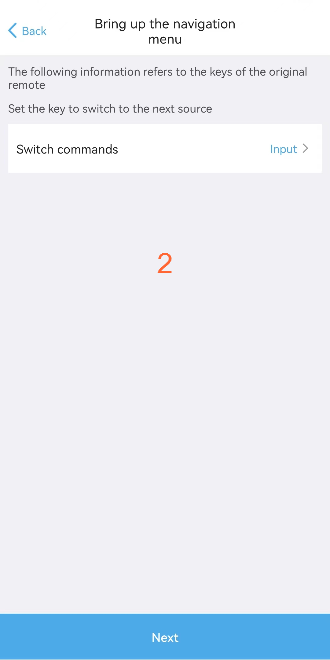
2.2.2 Bring up the navigation menu
First, confirm the method of switching inputs and the commands used for switching.
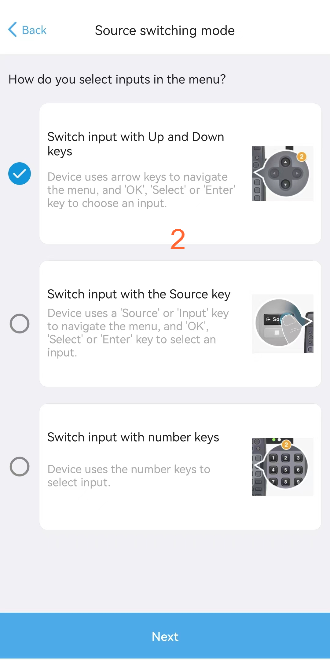
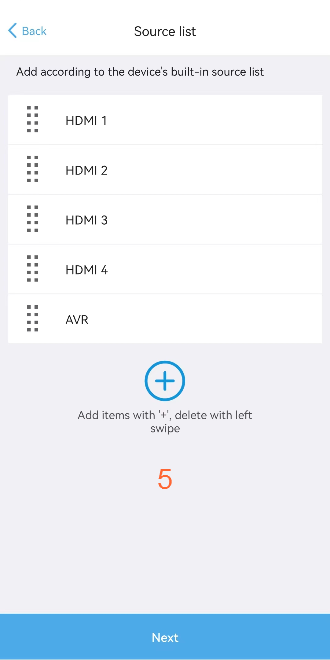
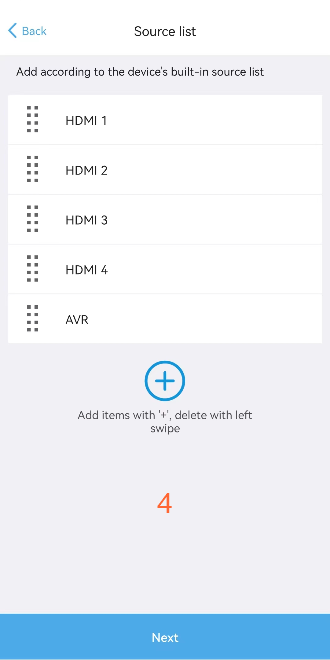
Next, enter the source list strictly according to the built-in menu order of the device.
If the order of the source list entries does not match the actual situation of the device, it may cause confusion when switching activities.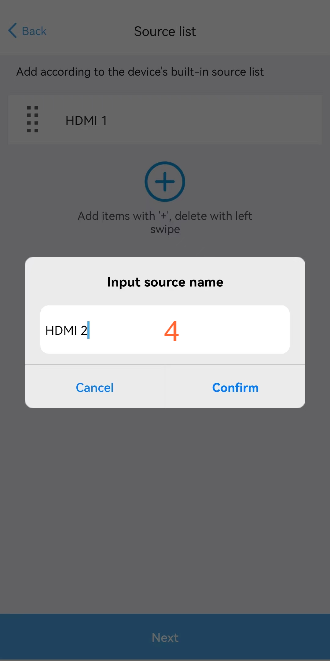
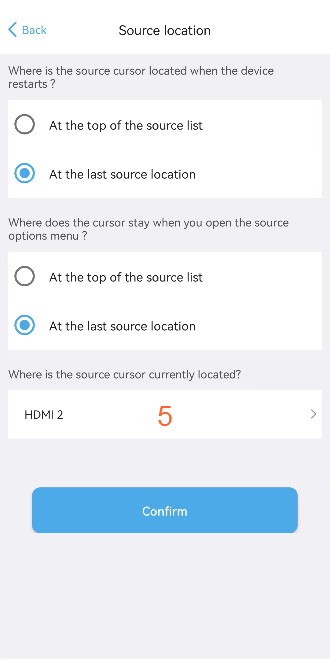
Finally, confirm the current source location.
This allows the system to automatically switch to the correct input when activities start.
2.2.3 Input toggling / Cycling
First, select the commands used for switching input.
Next, enter the source list strictly according to the built-in menu order of the device.
If the order of the source list entries does not match the actual situation of the device, it may cause confusion when switching activities.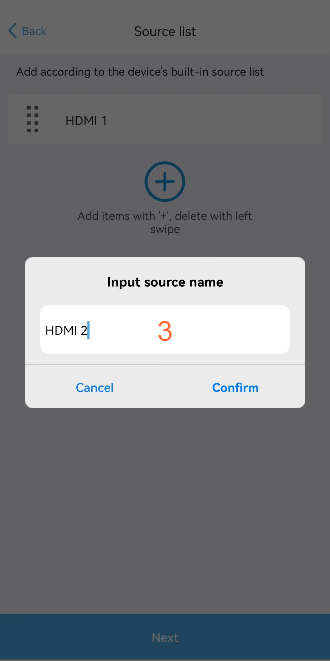
Finally, confirm the current source location.
This allows the system to automatically switch to the correct input when activities start.