
This article will guide you how to add devices to your hub.
Preparation:
Before we begin, please make sure that your Hub is connected to your Wi-Fi network. If it isn’t, you’ll need to set it up before proceeding. For guidance on this, you can consult the Connecting to hub article.
Setup Procedure:
Once your Hub is connected, launch the app on your device, and it will automatically connect to the most recently connected Hub.
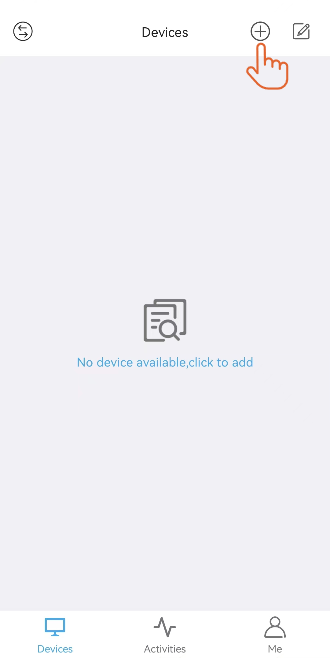
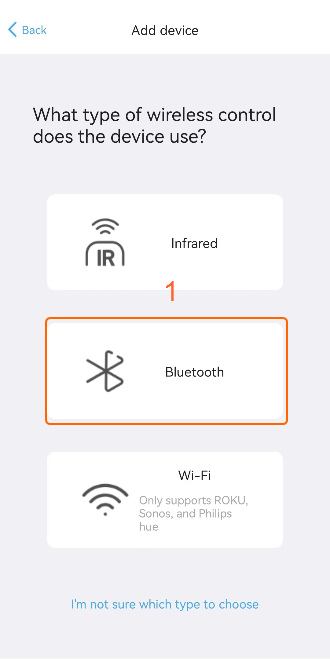
Navigate to the “Devices” page, and click the “+” icon in the upper right corner to add a new device.
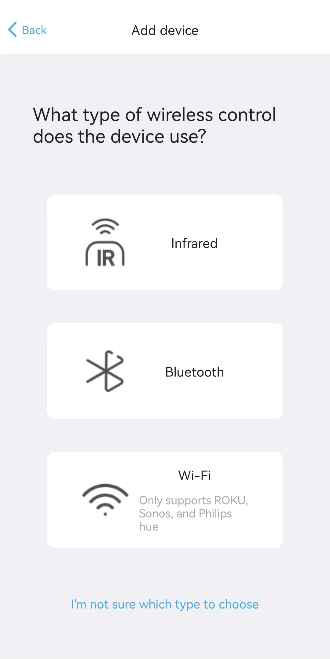
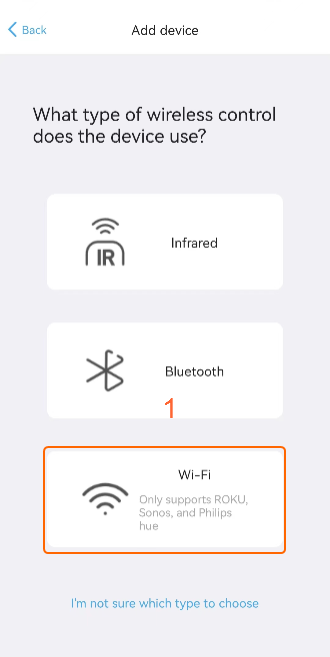
There are three options for adding devices: Infrared Control, Bluetooth, and Wi-Fi.
If you are unsure about the control technology of your device, please consult the article I‘m not sure which type to choose.
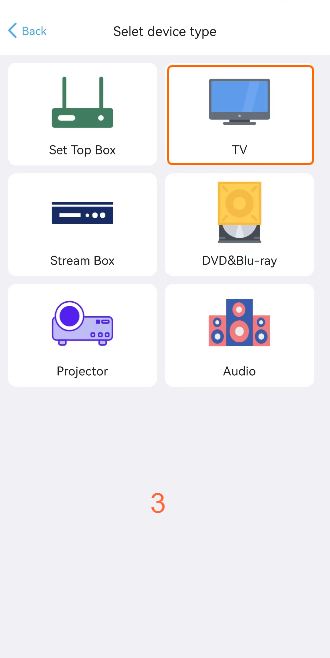
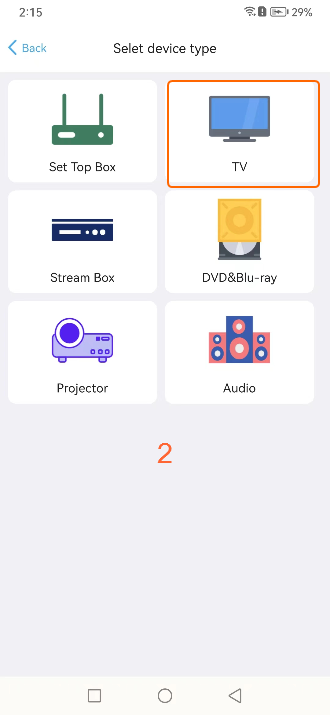
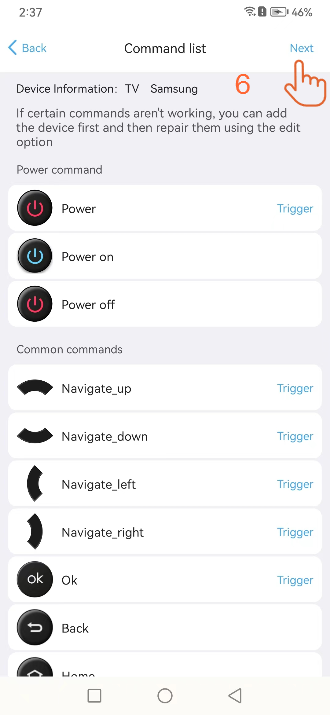
Next, follow the instructions on the app page to complete the subsequent settings. You can select the actual device type to view detailed instructions.
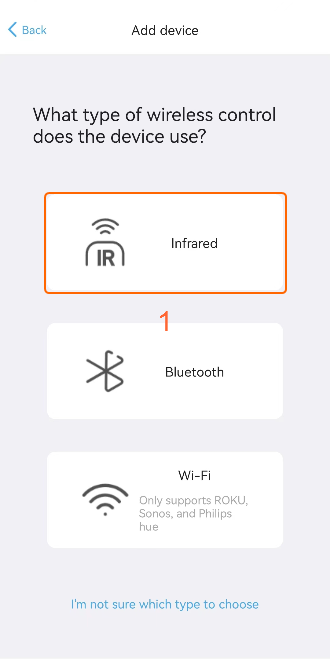
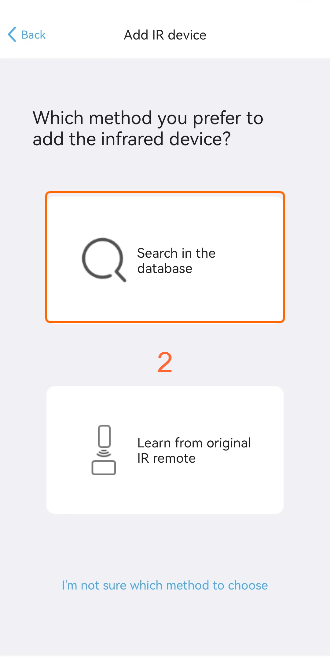
1. Add a Infrared device
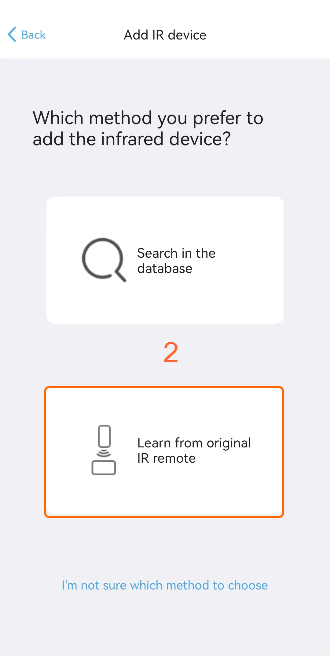
You can add an infrared device in two ways: by learning from the original IR remote or by searching in the database to download the code library.
If you only need one or two commands for daily use, such as Power, it is recommended to learn directly from the original remote. Otherwise, it is advisable to prioritize searching in the database.
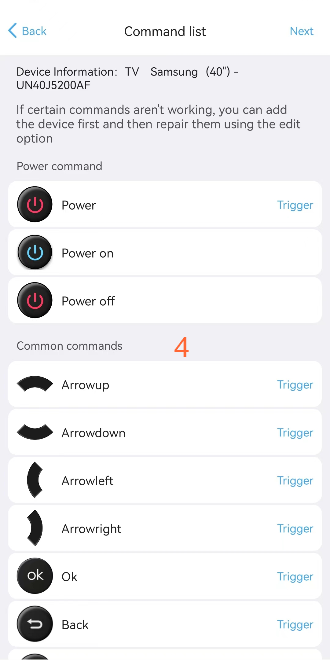
1.1 Learn from original remote
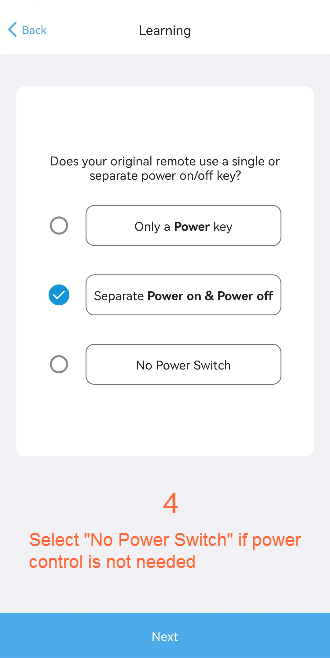
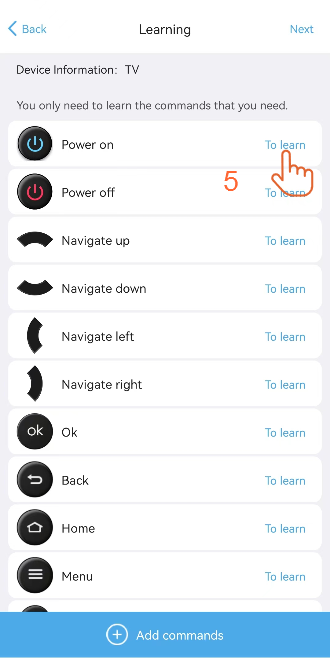
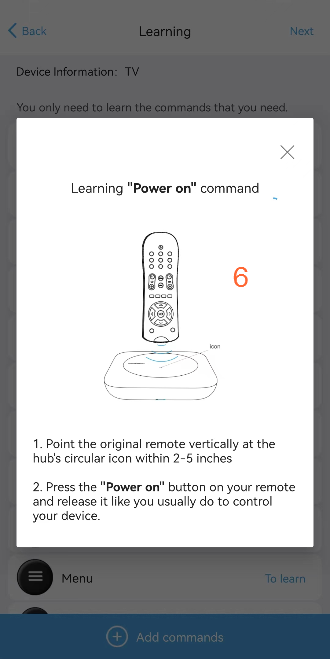
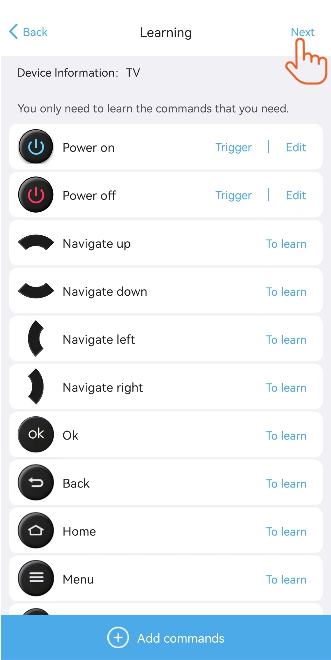
![]()
If you’re having trouble with command learning, go back to the previous menu and try entering the learning mode again.
If the command seems to have been learned successfully but isn’t working when you test it, give learning another shot. Remember, there’s no need to hold the button down—Just a quick press and release, as you would normally do, ought to do the trick.
1.2 Search in the databae
Under normal circumstances, you can add a device directly by brand and model.
If you can’t find an exact match for the model in the database, you could also try adding a device with a similar model, or choose a universal code library from the same series.
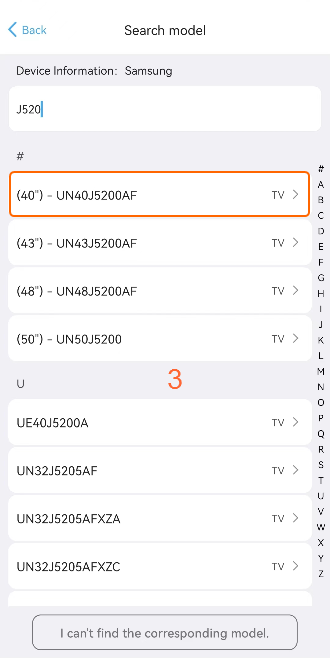
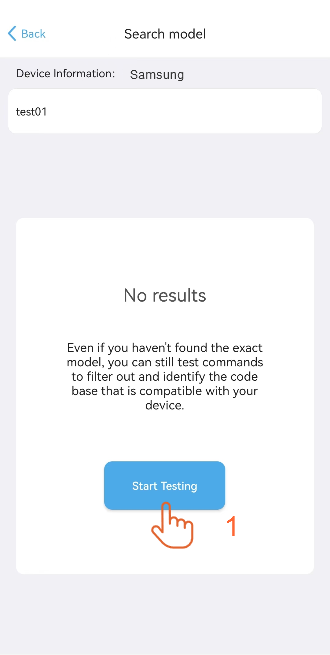
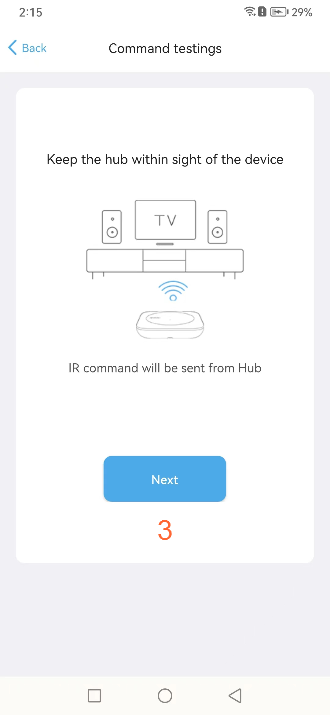
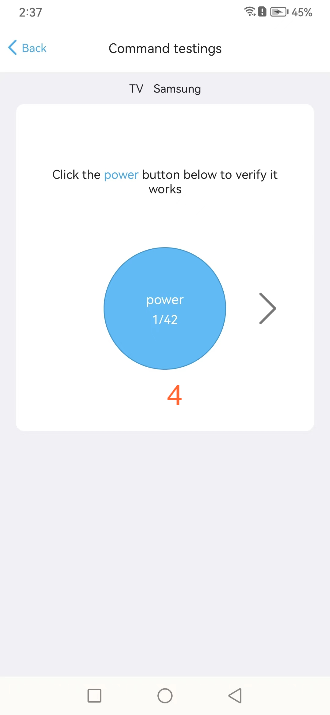
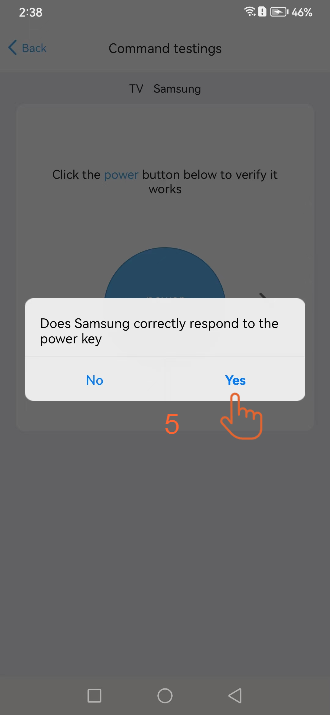
1.3 Test commands to match the correct code library.
If your device model is not in the database, you can test a few commands to find a suitable code library. select“I can’t find the corresponding model” after searching your device brand.
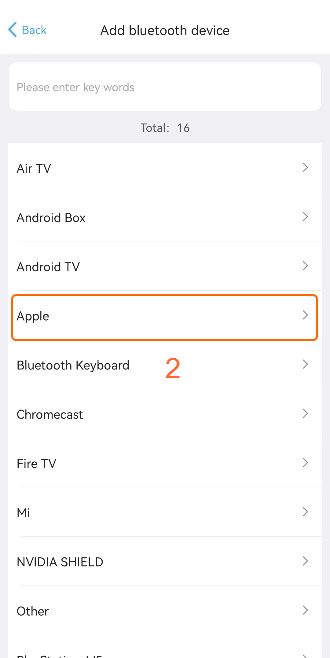
2. Add a Bluetooth device
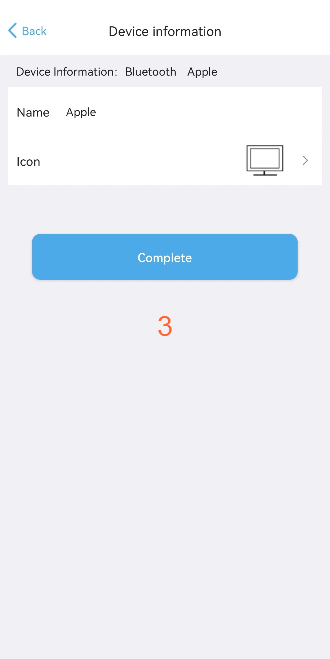
Let’s take a look at how to add a Bluetooth-controlled device using Apple TV as an example. Since AppleTV is a Bluetooth-controlled device, you will need to navigate to the Apple TV settings to complete the pairing process. To accomplish the task, follow these steps:
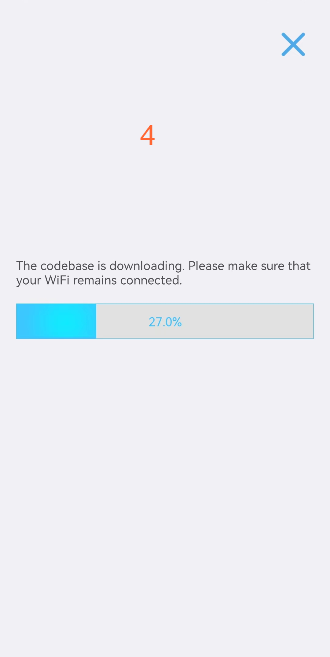
Stage 1: Please choose your device and proceed with downloading the code. The process may take approximately twenty seconds.
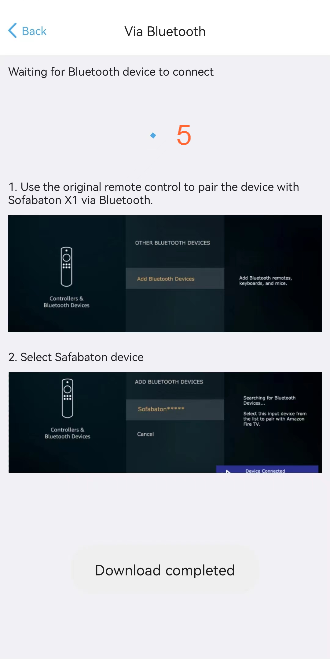
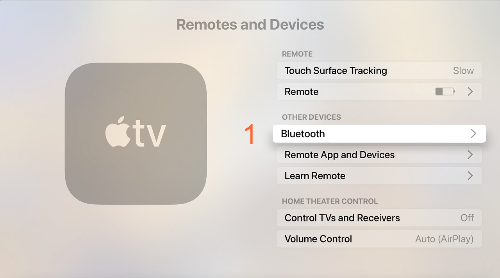
Stage 2: Go to the settings of your Apple TV, navigate to ‘Bluetooth’, and select the device starting with ‘Sofabaton’ to pair.
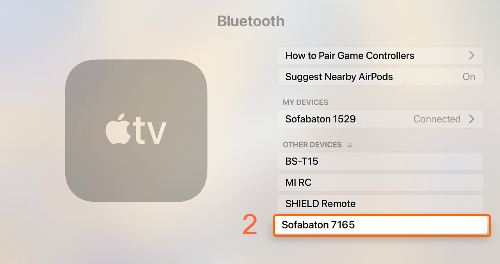

The application will display a notification indicating that the device has been added successfully.
![]()
If your device brand isn’t listed, you can opt for a generic device such as a Bluetooth keyboard, Android box, or ‘Other’. Once paired, the X1 should be able to control it normally.
If your Bluetooth cannot find a device starting with ‘Sofabaton’, try restarting your Bluetooth device. Then, go back to the previous page in the Sofabaton app and continue, to allow the hub to re-enter pairing mode.
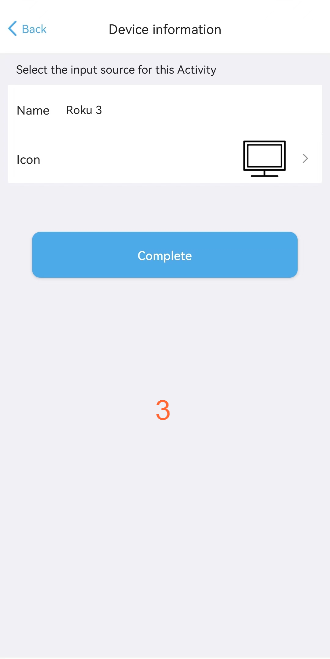
3. Add a Wi-Fi device
Currently, we only support devices from Roku, Sonos, and Philips Hue.
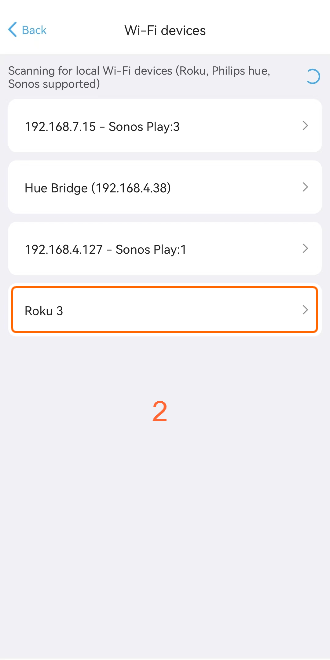
Choose the ‘WiFi’ option for adding a device. The app will automatically scan for devices that can be connected within the same WLAN. After you select the device you wish to add, simply follow the instructions displayed on the screen.
![]()
Please make sure one item is enabled on the settings of your Roku before adding it in our app by WIFI mode:Kindly go to the Roku Settings/System/Advanced Settings/Control by mobile apps/Network access (It was set to disabled. pls switch it to enabled);
If you’re having trouble finding your Roku,please confirm you are able to control your Roku in the Roku app first and Roku,your cell phone/our app, our Hub are supposedly working within the same network plus the same 2.4Ghz band of WIFI.
Wi-Fi device is controlled via IP, if your device IP changes, the remote control may fail. You can fix this by going to the following location in the app:
App –> Device –> XXX –> Edit –> Reset device IP.