Preparation:
Before you begin, ensure that you have added all necessary devices to your U3. If you need help, please refer to our “Adding Devices” tutorial.
Procedure:
1. Create a New Macro
Create custom Macros to trigger a sequence of commands with a single press, turning complex steps into effortless shortcuts.
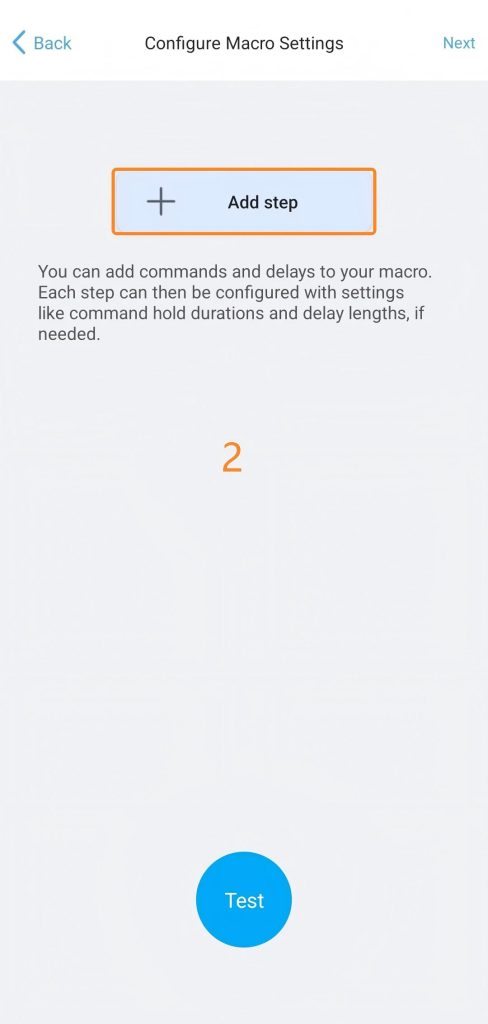
Step 1: Accessing Settings
Navigate to Macros > Add > Add step to begin configuring your command sequence.

Step 2: Command Settings
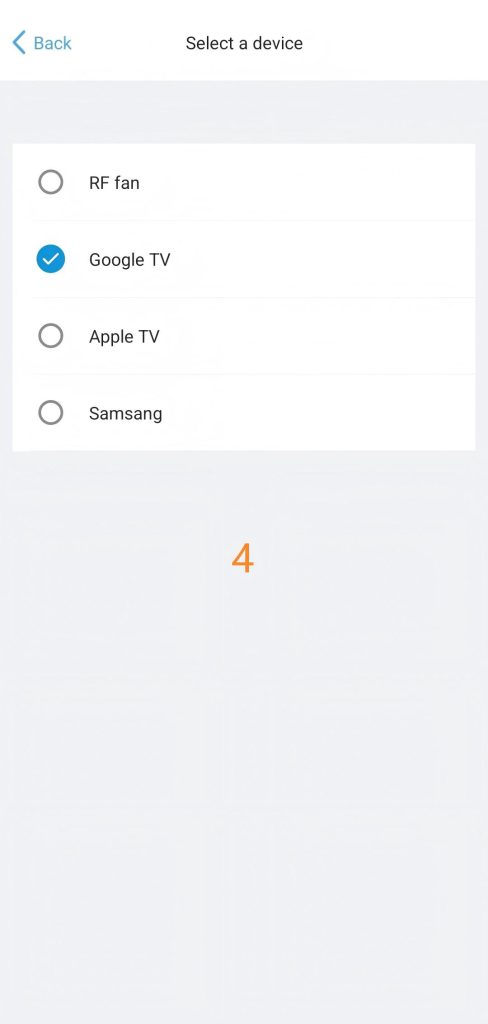
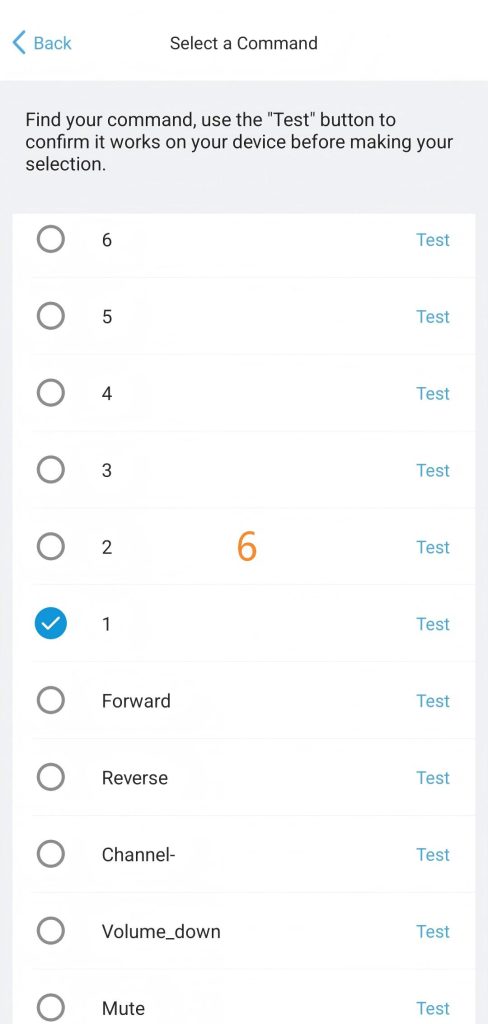
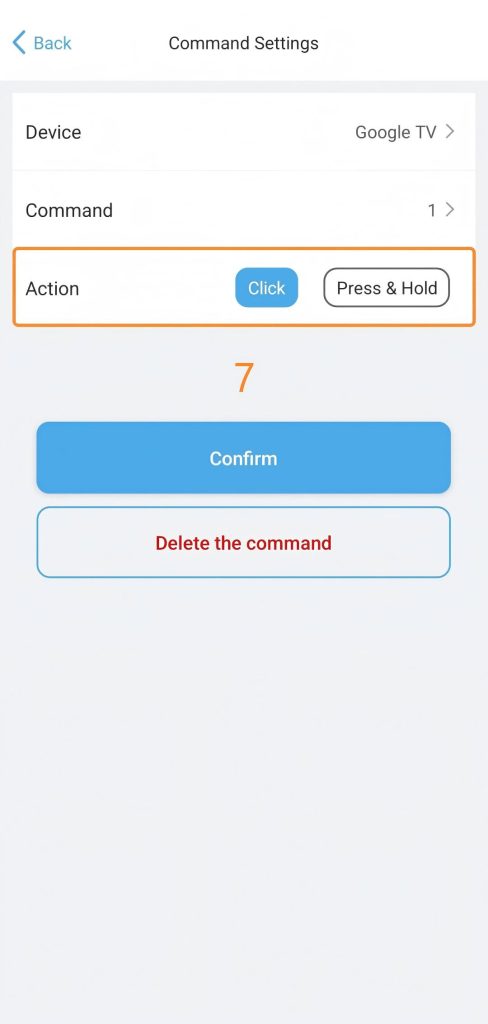
1)Select the Device and the specific Command.
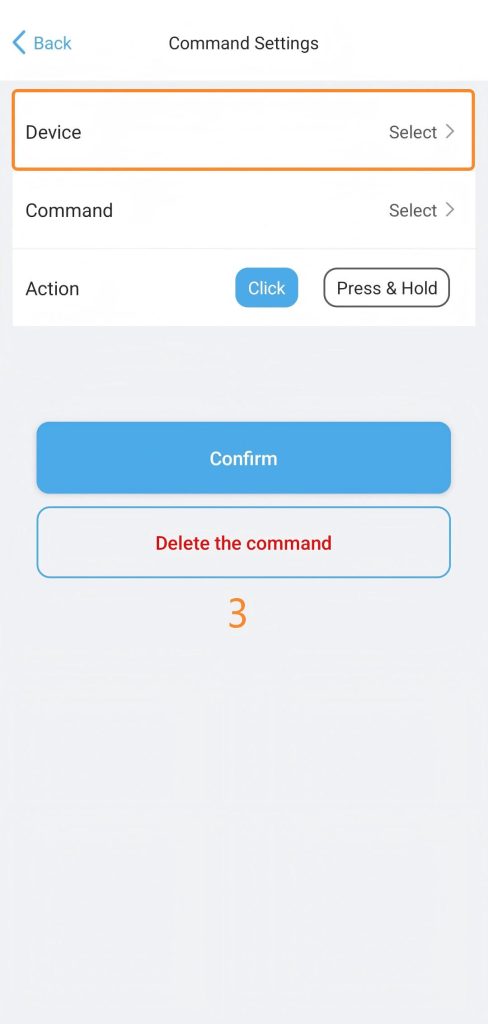
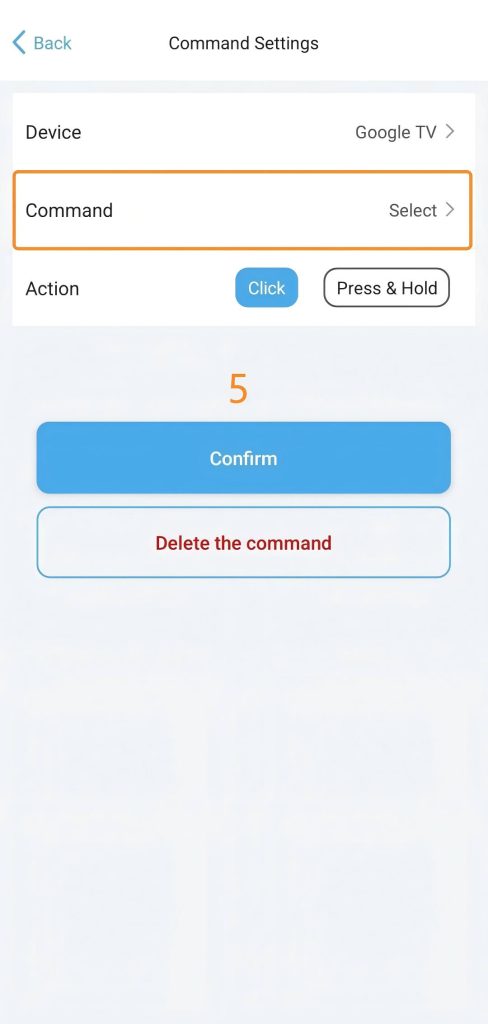
2)Select whether to trigger a ” Click ” or ” Press & Hold ” the command,Then, tap “Confirm” to save the step.
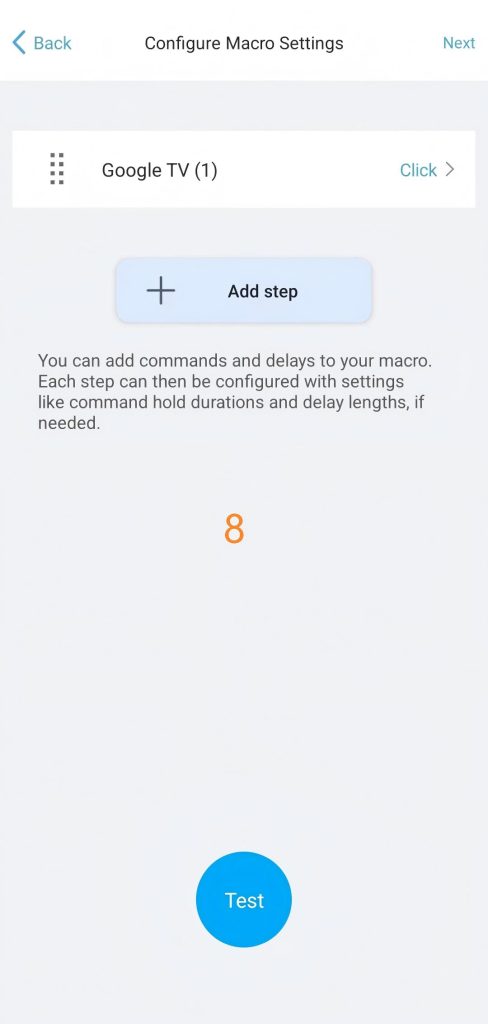
3)Next, you can repeat the above steps and add multiple commands to complete your macro settings.
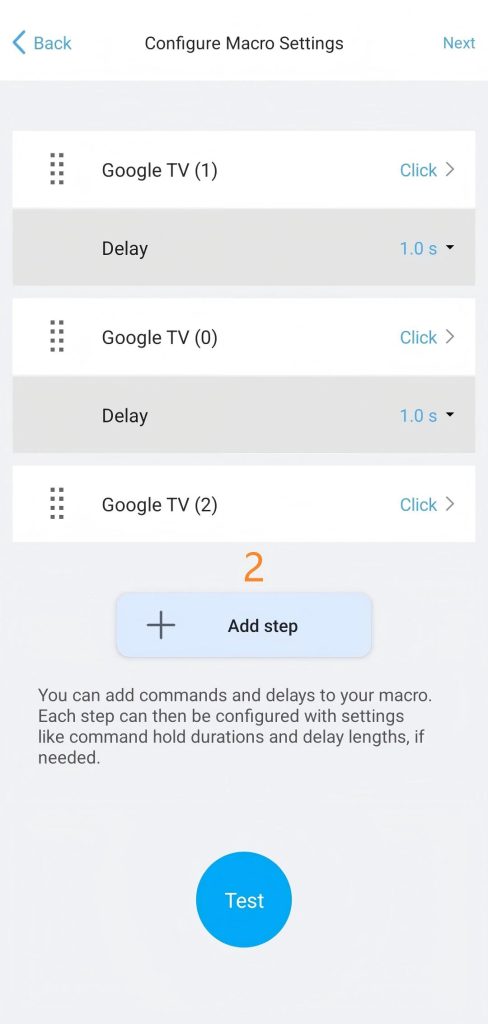
Step 3: Refine the Sequence
1)For example: To set up a macro for quickly switching to channel 102, you need to add command actions for ‘1’, ‘0’, and ‘2’ in sequence on the Configure Macro Settings page.
2)Manage Delays: Adjust the delays between commands as needed to ensure reliable and correct execution.
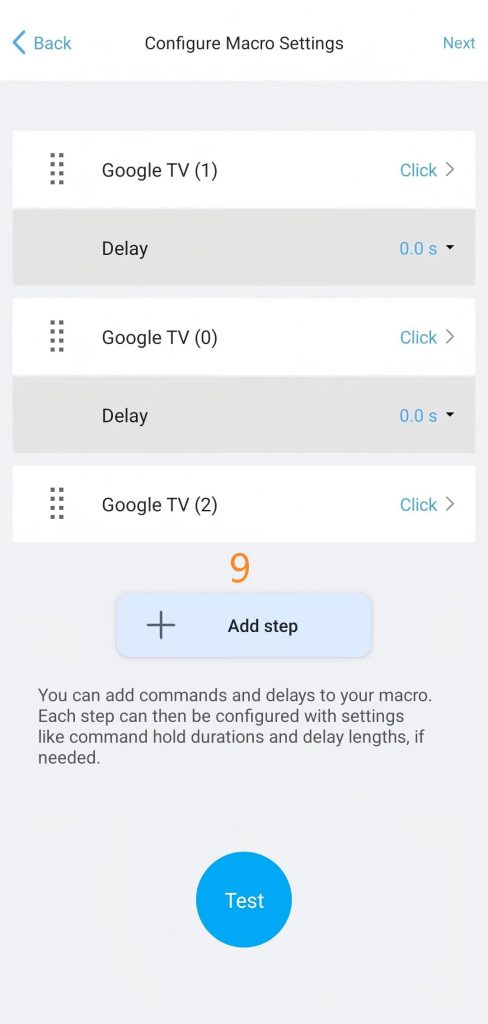
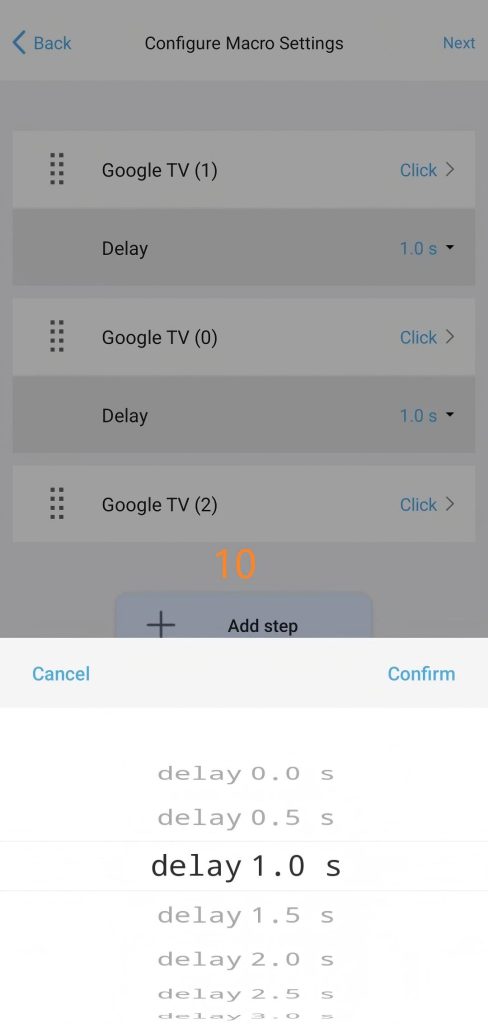
3)Test & Save: Review the full sequence, then test the macro startup to ensure the new commands work before saving your changes.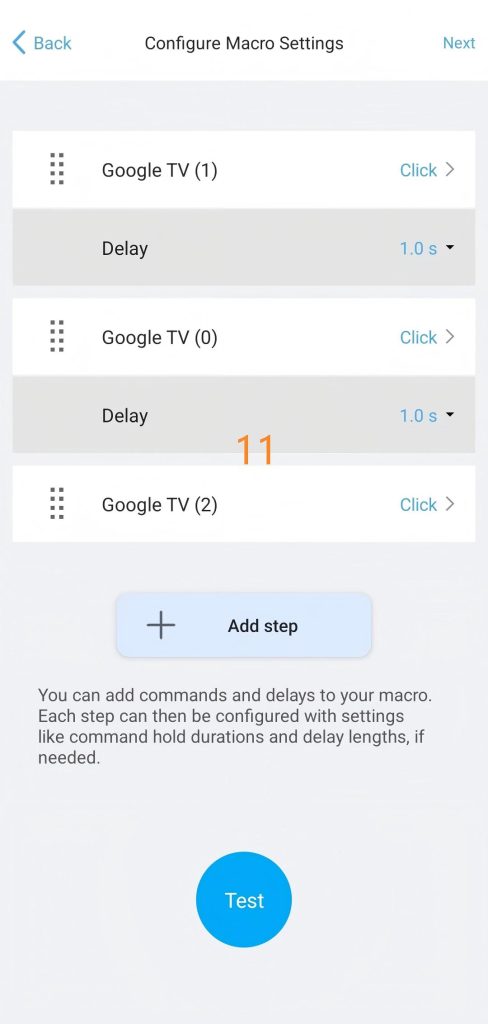
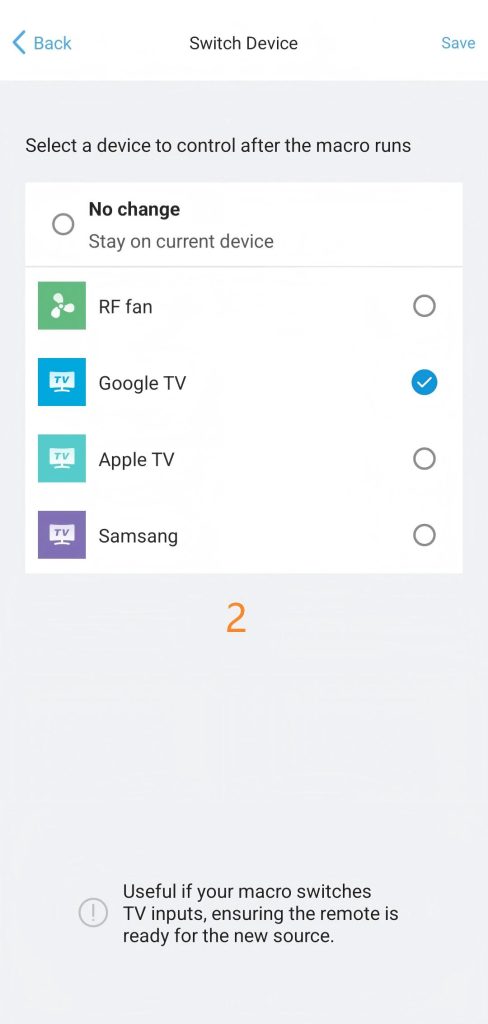
Step 4: Switch Device
Select the target device you want the U3 remote to control once the macro sequence finishes.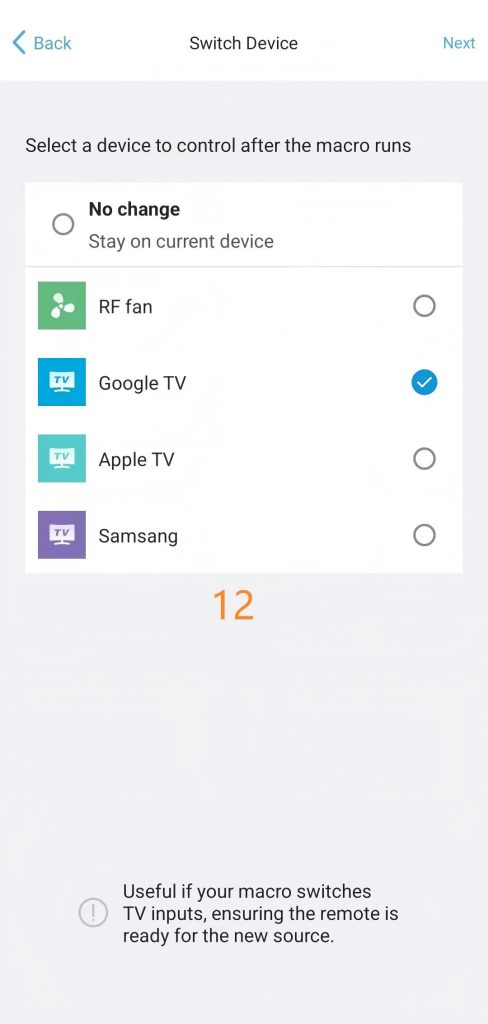
Step 5: Name and Save
Give your macro a name and select an icon to display on your U3 remote control screen.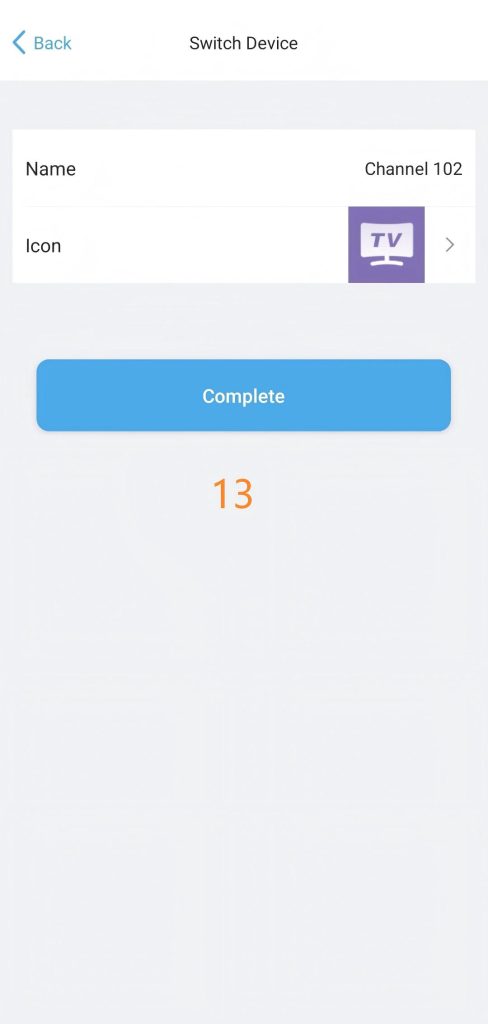
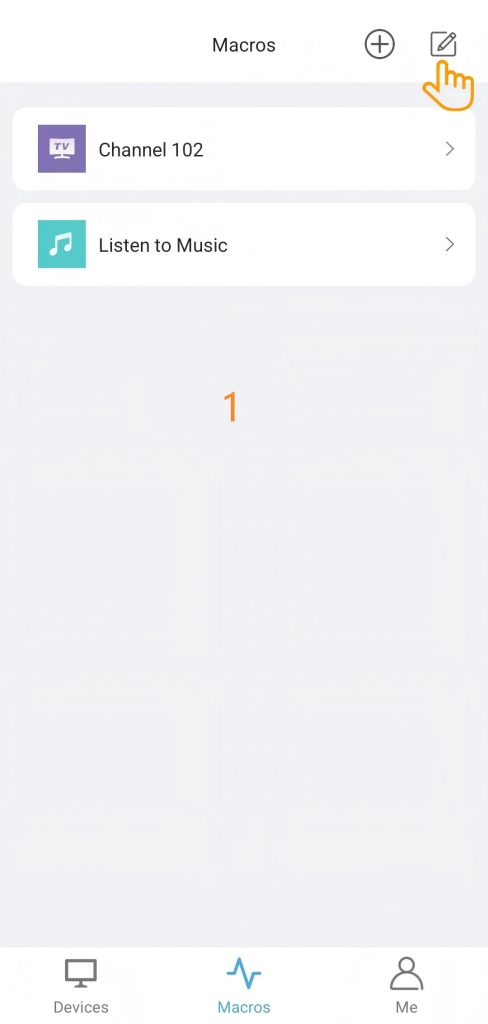
2. Edit Macros
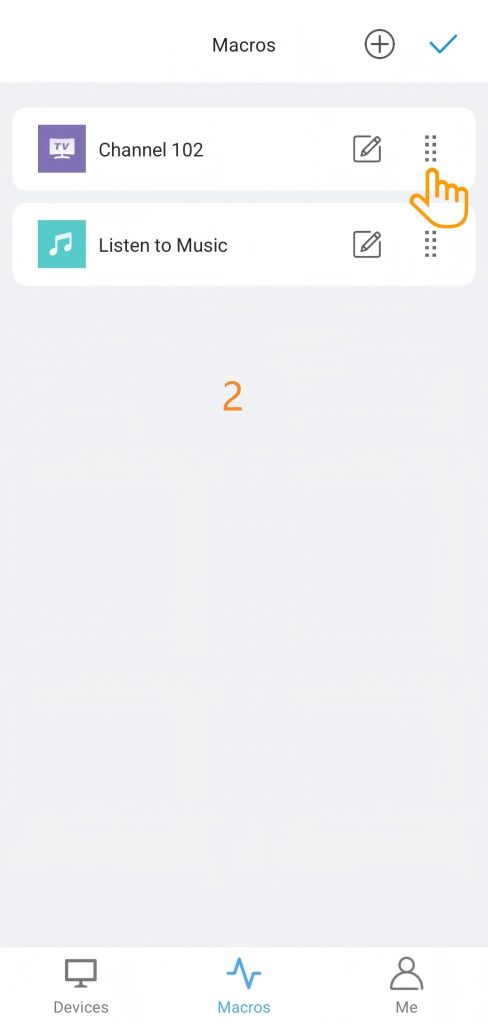
2.1 Sort Macros
You can rearrange the order of macros to your liking.
1)Tap the Edit button in the top-right corner.
2)once the reorder icons appear, simply long-press a Macro and drag it to your desired position.
3)Click ” √ ” in the upper right corner to save.
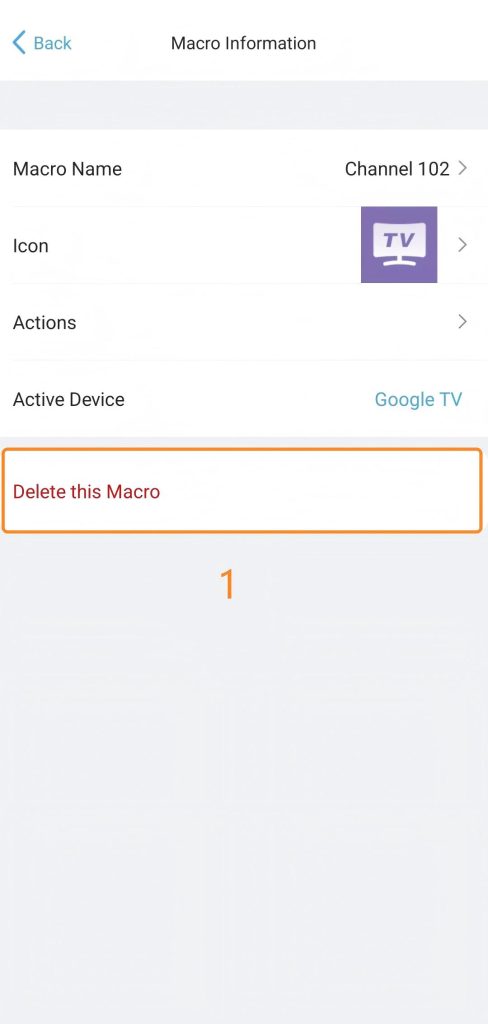
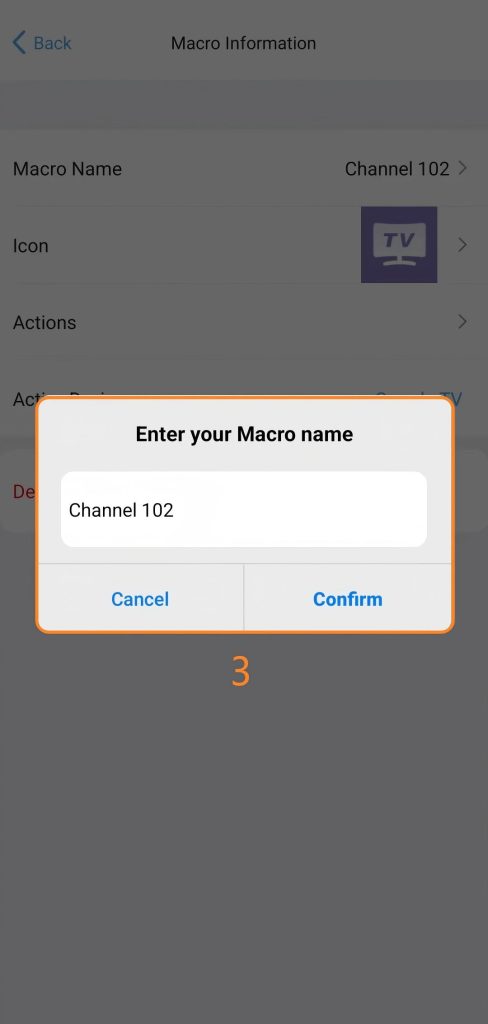
2.2 Edit Macro Name
The macro name may be modified as desired.

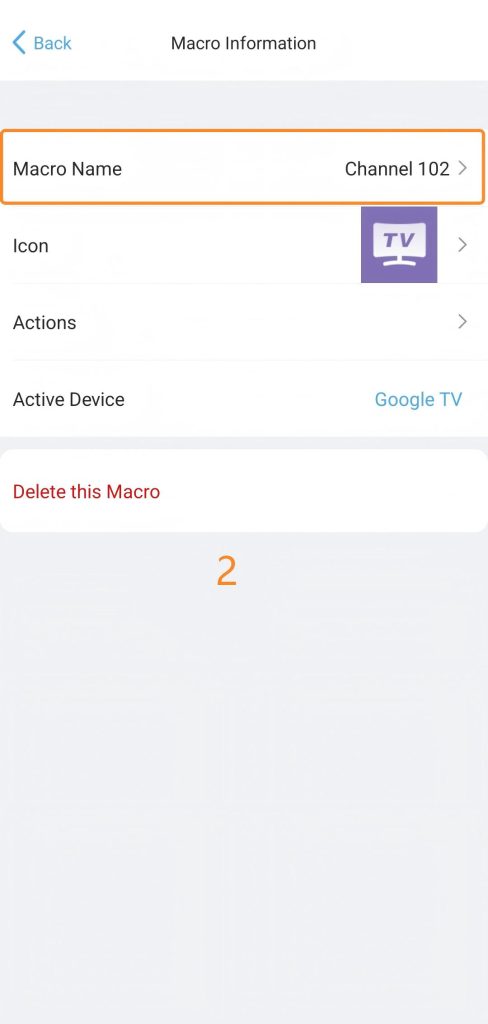
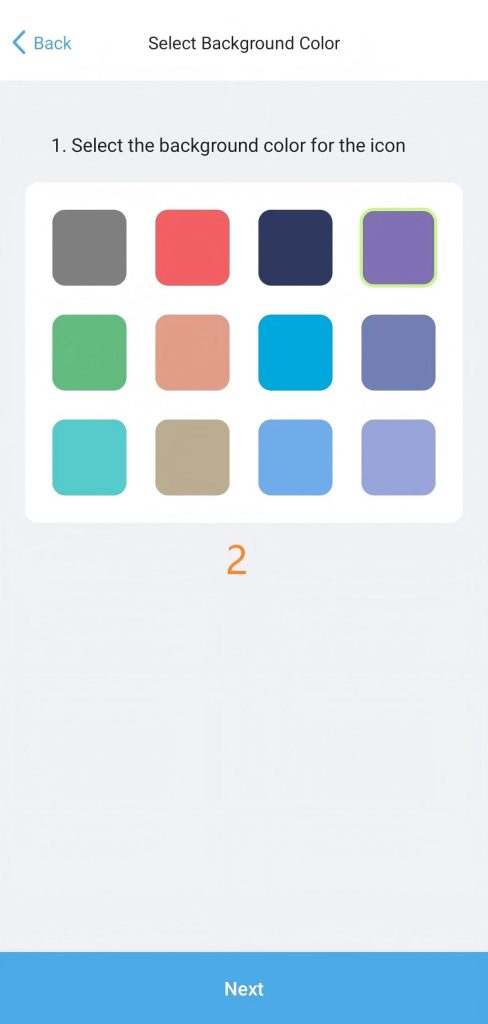
2.3 Edit lcon
The icon and background of each macro can be set.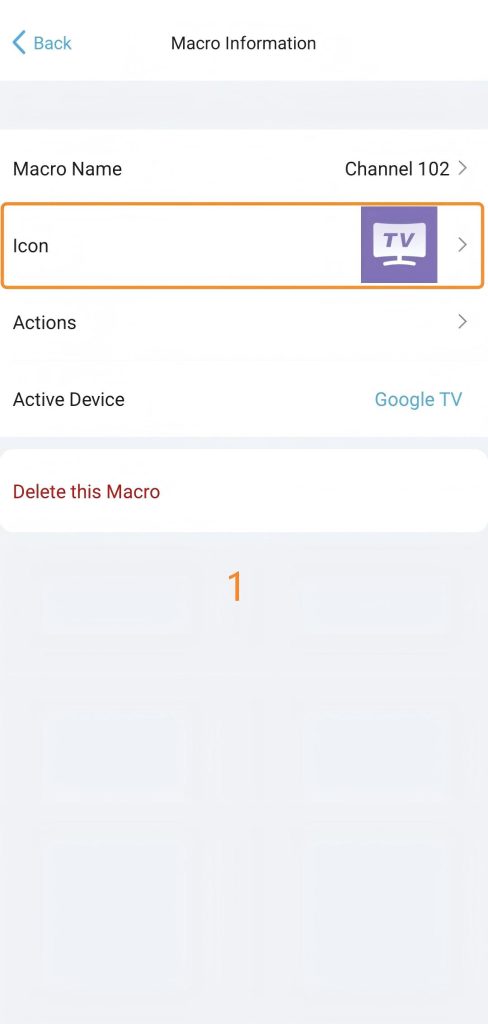
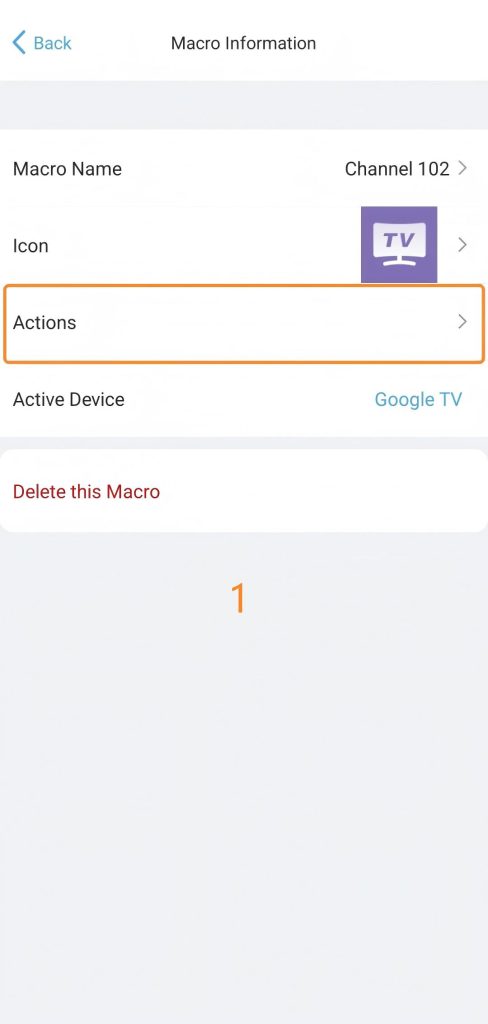
2.4 Actions
Here you can edit the macro command sequence.
2.5 Active Device
You can edit Active Device here.
2.6 Delete this Macro
You can delete macro commands you don’t need.